In this activity, we'll draw some of the Earth's nature and landscapes: a waterfall, a volcano, and a beach.
Make sure to watch our step by step guide tutorial in the video below.
Materials
Copy paper or a sketchbook journal
Pencil 2b
Black ballpoint pen
Sharpie
Rulers
Instructions
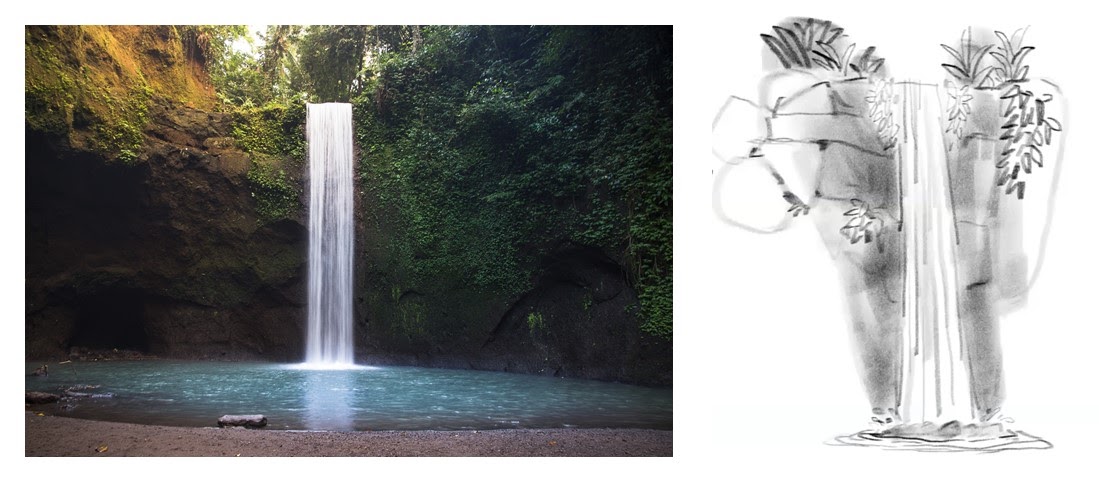
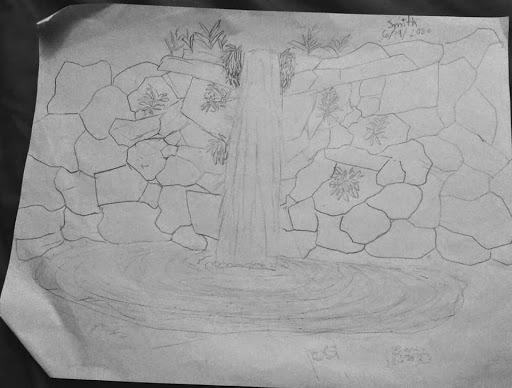
Tibumana Waterfall, Bali, Indonesia; reference (left) and drawing (right)
Step 1. Waterfalls
Waterfalls seem kind of hard to paint or draw, but they are usually made of rectangles if you look at them. Some waterfalls are thin at the top that widens at the bottom. Let's combine those shapes to draw a waterfall!
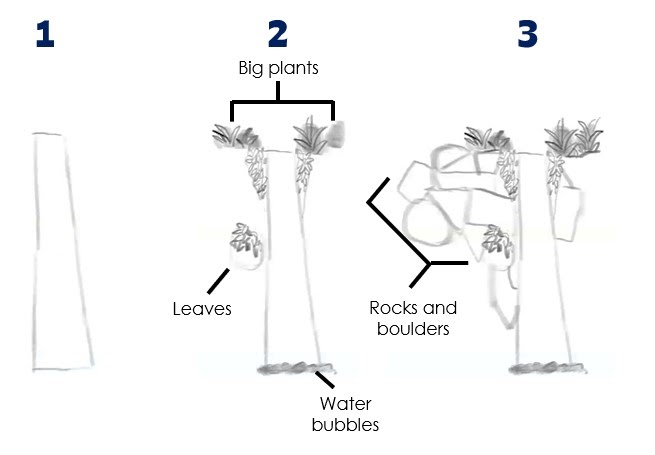
1.First, draw a rectangle that is narrow at the top and wide at the bottom.
You can bring out shapes using values or line textures.
2.Using the side of your pencils, make a slightly darker tone of tiny bubbles at the bottom part of the waterfalls.
Draw a patch of leaves around the edges at the top part of the waterfall using small triangles or teardrop shapes. Draw another patch of leaves on the left side of the waterfall.
Create circular tones at the top of the waterfall, then draw big plants.
3. Look at the reference picture, and you'll see that around the waterfall are big rocks of different shapes and sizes. To make these, draw a mix of triangles, squares, and circles on the left and right sides of your waterfall.
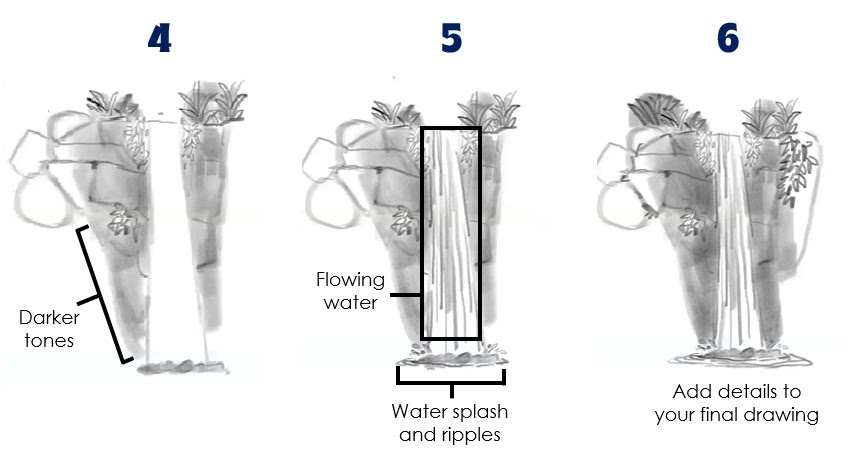
4. Add some dark tones on the rocks to highlight the waterfall.
5. Create some ‘water' movement to the waterfall. Draw thin and thick lines from the top going down. You can also draw small lines, big lines, and broken lines to show the movement of water falling.
Let's add the splash at the bottom of the waterfall. Draw teardrop shapes near the ‘bubbly' water you created at the bottom. Ensure that it looks like it's going away from the moving water, just like a splash.
Trace some ripple lines around the ‘bubbly' water that goes out of the moving water.
6. Get your creative juices flowing and add details such as water ripples, additional plants, and leaves to your waterfall drawing to make it more beautiful!
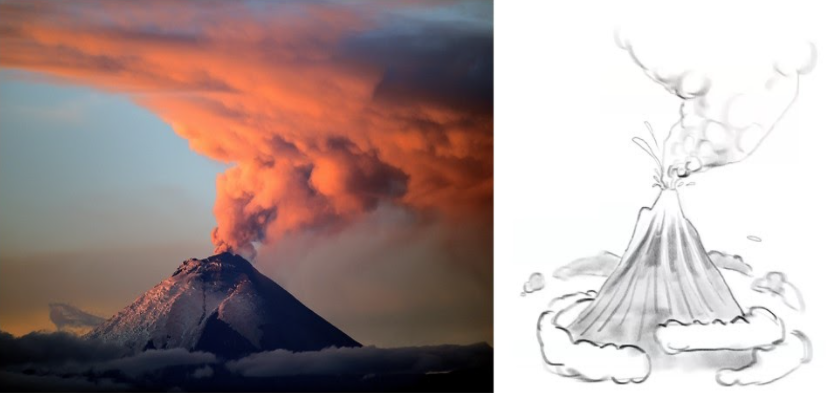
Cotopaxi Volcano, Cotopaxi, Ecuador; reference (left) and drawing (rlght)
Step 2. Volcano
Volcanoes are not usually perfect triangles. It has a large crater or the mouth of a volcano where lava comes out in our picture.
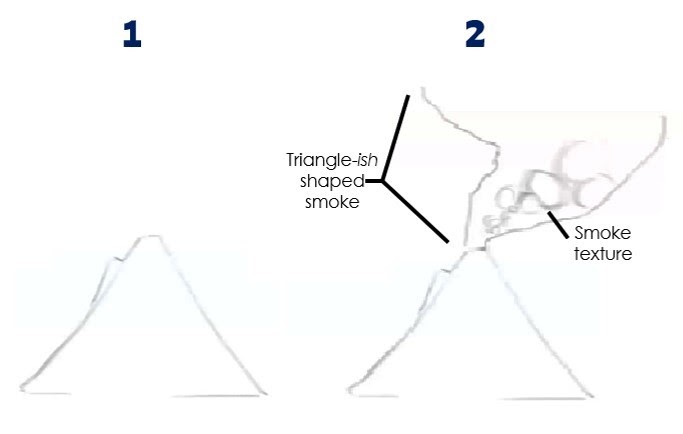
1. Draw a triangle-ish shape with two tips – one of which is lower than the other.
2. For the smoke, draw a wavy triangle-ish shape from the mouth towards the top from where it gets wider. Draw different sizes of circles inside the smoke for the texture.
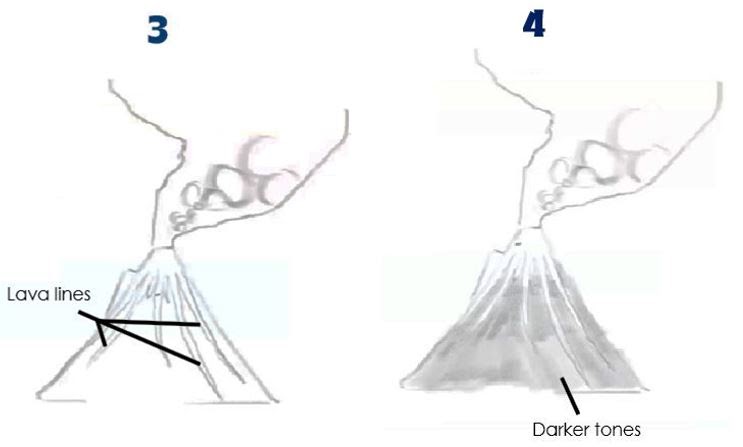
3. For the lava, draw a bunch of connecting lines from the mouth towards the bottom. You can make small or big connecting lines, or narrow or wide. It all depends on how you want your volcano to look.
4. Make a darker tone for the parts of the volcano where there is no lava.
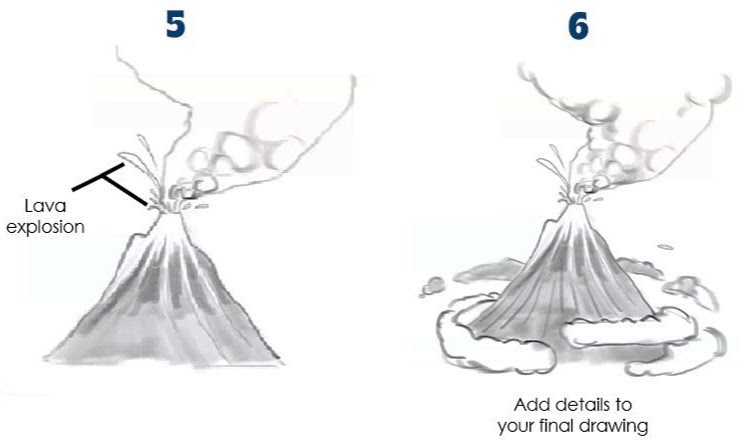
5. Let's add details to the explosion. Just like in the waterfall drawing, draw teardrop shapes near the crater. The bigger the teardrop shapes, the bigger the explosion.
If you look at our picture, you can see clouds around the volcano. Draw two wavy rectangle-ish shapes on the two sides of the volcano.
6. Draw the left cloud in a way that it circled around the volcano. This will show the left cloud in the foreground, the volcano in the mid-ground, and the part of the left cloud that enveloped in the background.
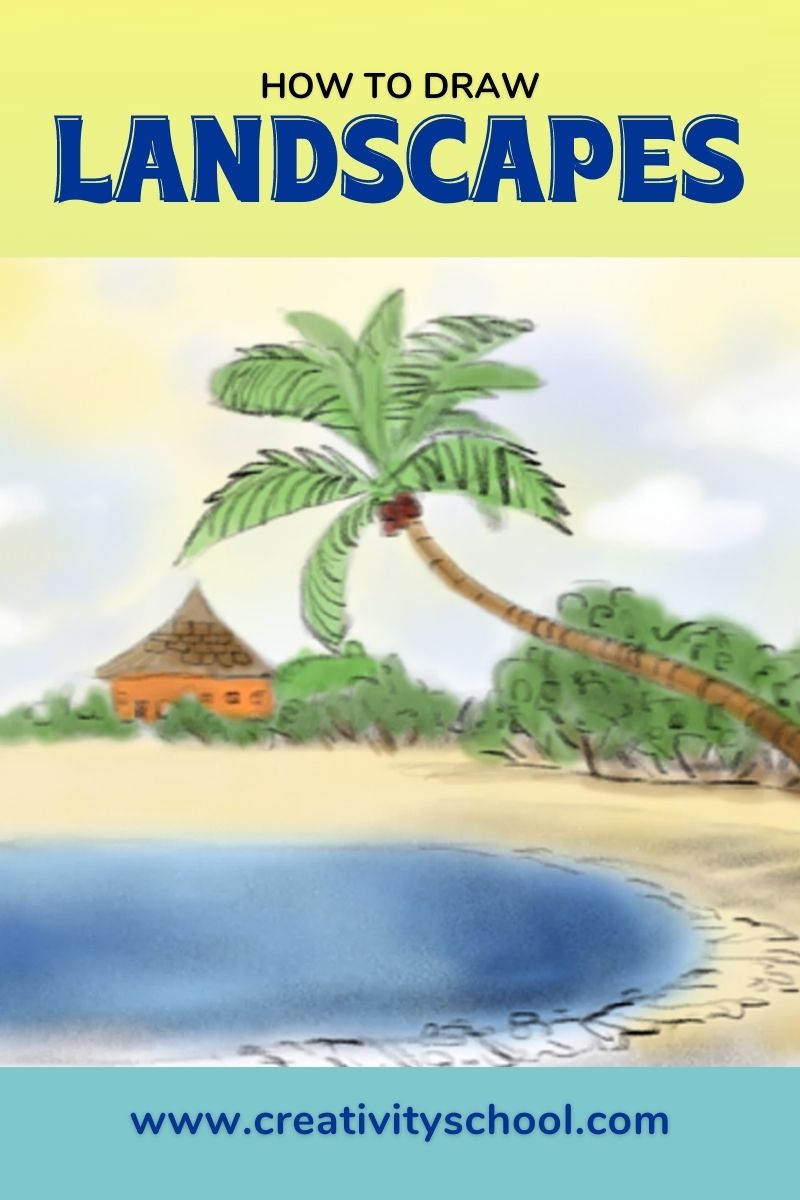
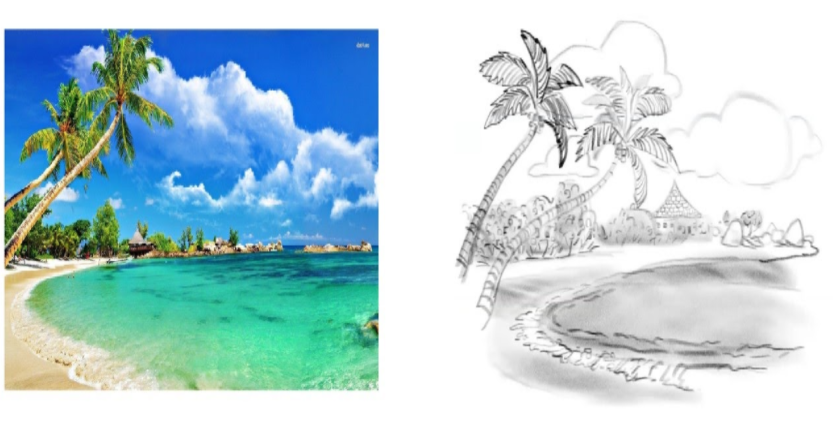
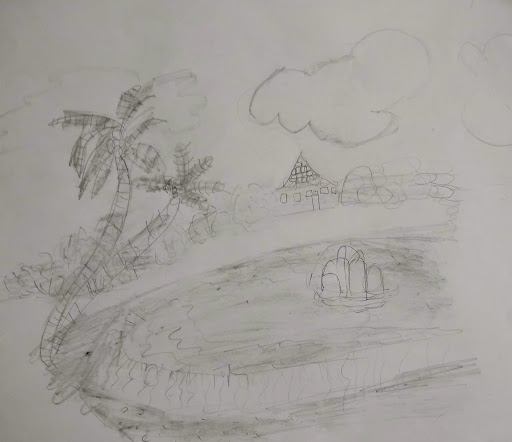
Tropical beach reference (left) and drawing (right)
Step 3. Sandy Beach
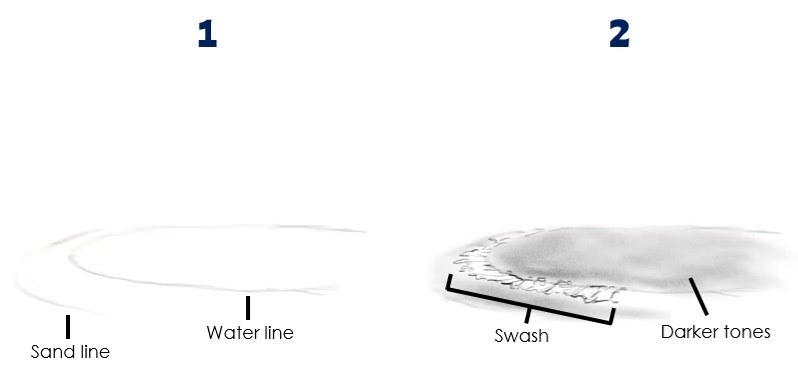
1. First, draw an oval for the water, then draw a curved line on the left side for the beach.
Add a darker tone to the water. You can see in the picture the swash before the sand. Since the sand is darker than the swash, add a darker tone along the curved line leaving white space in between.
2. Draw a bunch of lines and teardrop shapes on the white space to show the swash.
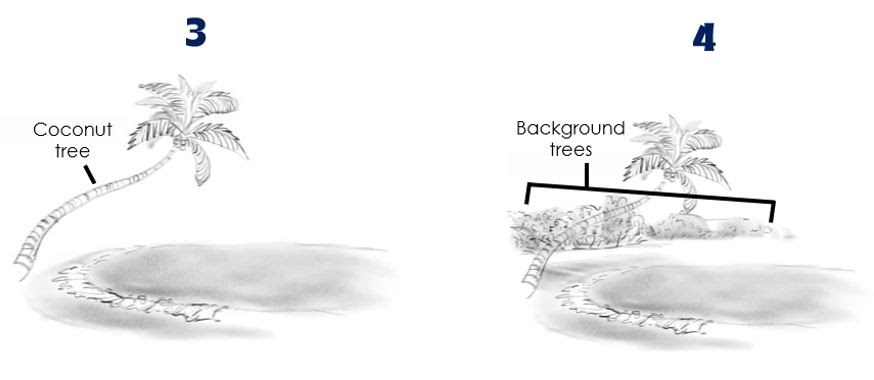
3. Let's draw the coconut tree!
Draw the trunk using a narrow cylinder on the left side of the sand. You can remove it elsewhere, but for the purpose of this fun activity, we are going to use the picture for our reference.
Then, draw small curved lines inside the trunk for the bark texture.
Then, draw 3-4 small circles on top of the trunk for the fruit.For the leaves, draw 4-5 ovals or triangles on top of the fruit. Add lines or small triangle-ish shapes inside the leaves for the texture.
4. Behind the coconut tree, add dark, circular shades for our background trees. Draw lines and slight curves or squiggles for the trunk and leaves texture.
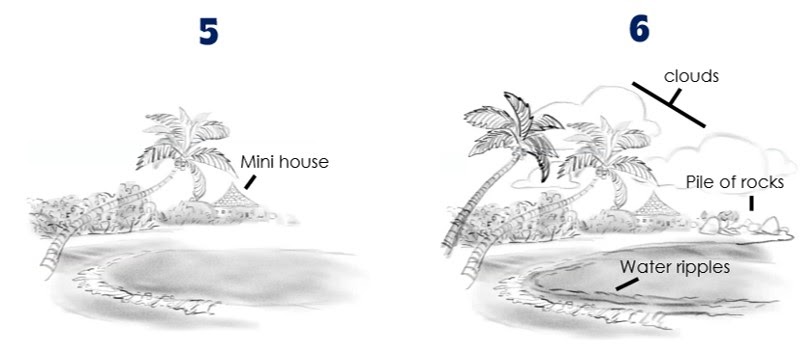
5. For the house, draw a rectangle for the body and a triangle for the roof. Add roof details, windows, and a door.
6. Draw other objects such as a pile of rocks, water ripples, and clouds.
Wow! You’ve just created three magnificent nature drawings! Amazing!
Tips for art-mazing success:
It never needs to be perfect! Whether your lines appear crooked, or your curved lines are irregularly drawn, it’s okay! Practice is the key, and sometimes, these imperfections make your drawings so much better!
Draw any objects that you like to add to your drawings. Let your imagination shine!
You can add a darker value to the small shapes to show depths to your drawings. This will make the main parts of your drawing pop out.
You can draw while looking at your computer monitor or print this page to see each step in greater detail.
Check out some amazing nature drawings created at the Creativity School by our young artists!
Artworks from Creativity School by Smith S (top left), William B(top right), Tvisha M (bottom)
If you love nature and enjoyed this advanced drawing tutorial, share your thoughts in the comment section below.
“We can tell that Creativity School is having a positive impact on my son’s motivation for school and his overall well-being. We know art and creativity are always boosts for academics and health! This is proving it!!!"
- Celina G.
“Arree Chung, your class is fantastic! I am sure other parents would agree that Creativity School is more of a FAMILY DEAL! Because I, as a parent who has no drawing experience, learned too.”
—Miao