Beautiful Nature Drawing- Easy and Simple Step by Step Guide for Kids
Have you ever been in awe of the beautiful natural scenery around you that you wanted to learn how to draw that on paper? Don’t worry, we’re going to share how to create beautiful nature drawing step by step.
Drawing nature and landscapes is a fun way to spend time with kids while also enhancing their drawing skills. What more is it enables them to express themselves more freely and appreciate amazing creations around us.
Take out your pencils, and let’s start!
Recent Posts
Learn How To Draw and Paint at Creativity School!
Let’s begin the creative journey of your kids and enhance their potential this 2021!
Our award-winning artists give away free LIVE art classes from the Creativity School.
Learn how to make collages, animations, pop-up cards, draw ninjas, characters, paint, and much more!
Why is it important to learn how to draw elements in nature?
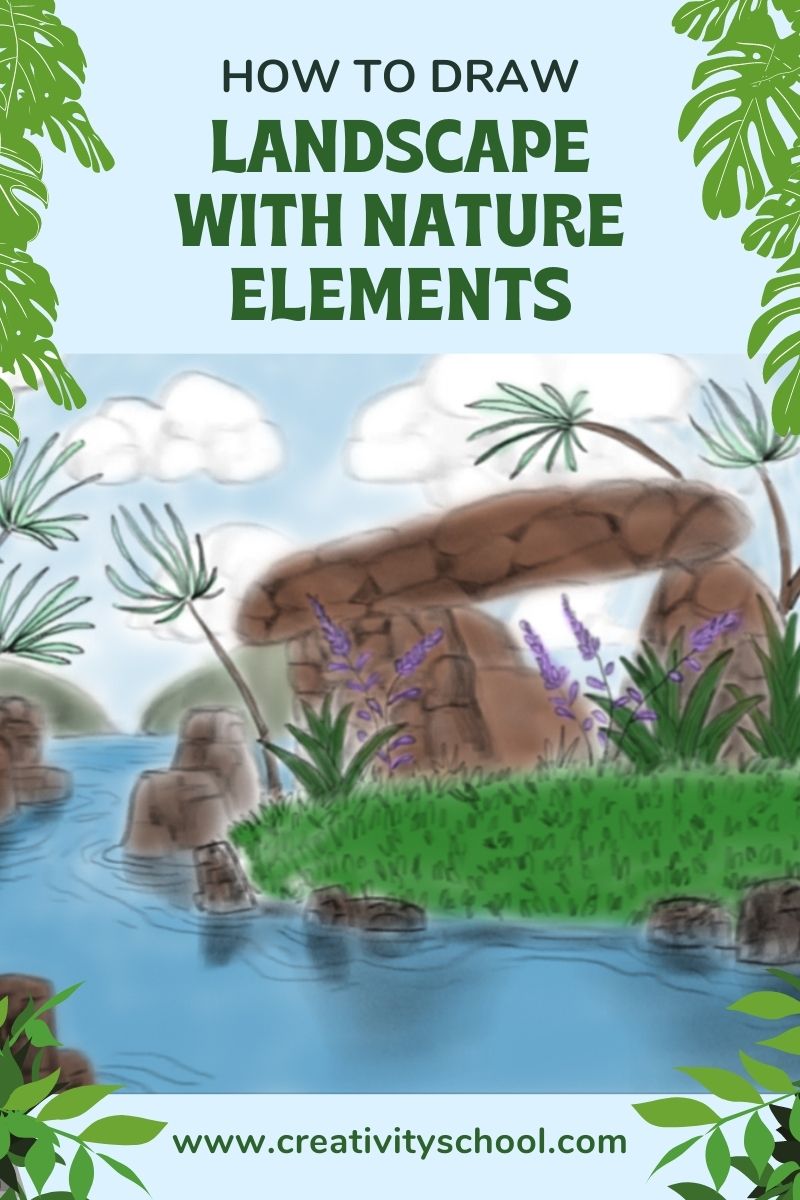
Example of nature elements (plants, rocks, water, and sky); Vectors courtesy of Creativity Schools’s Advanced Landscape Drawing with Chris Canga.
Because the beauty of nature is all around us, it makes up a great deal of what we see when we look out our windows or go outdoors.
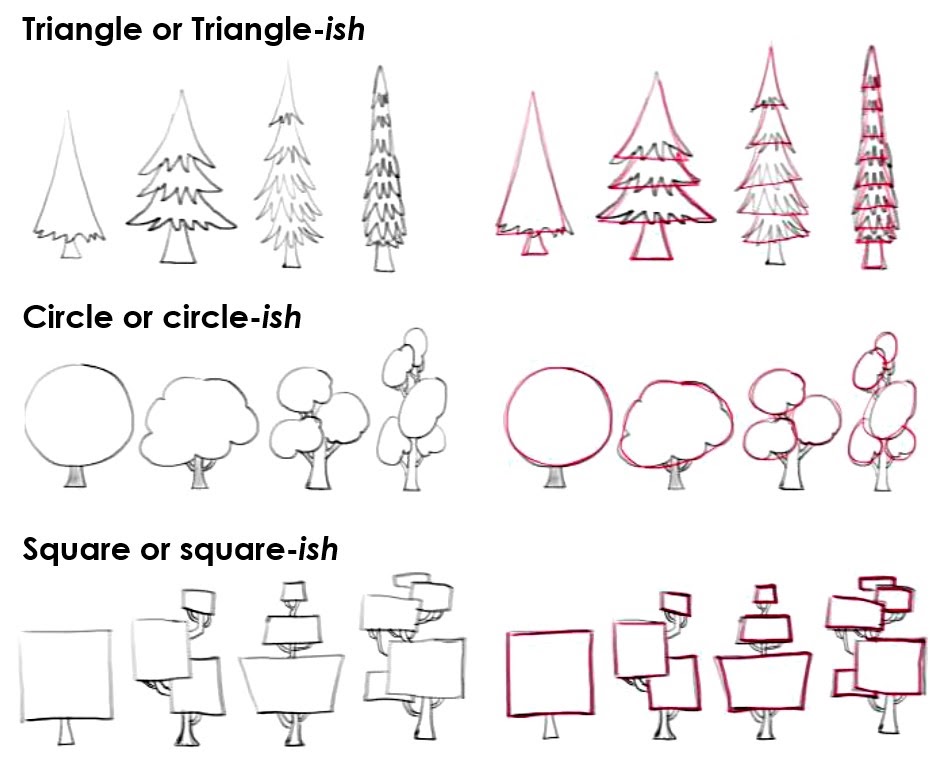
Basic shapes to use when drawing trees.
Basic shapes to use when drawing trees (triangle/triangle-ish, circle/circle-ish, and square/square-ish); Courtesy of Creativity Schools’s Advanced Landscape Drawing with Chris Canga
In our activity with the Advanced Drawing teacher, Chris Canga, we use the suffix –ish with our basic shapes. For example, triangle-ish means kinda like a triangle.
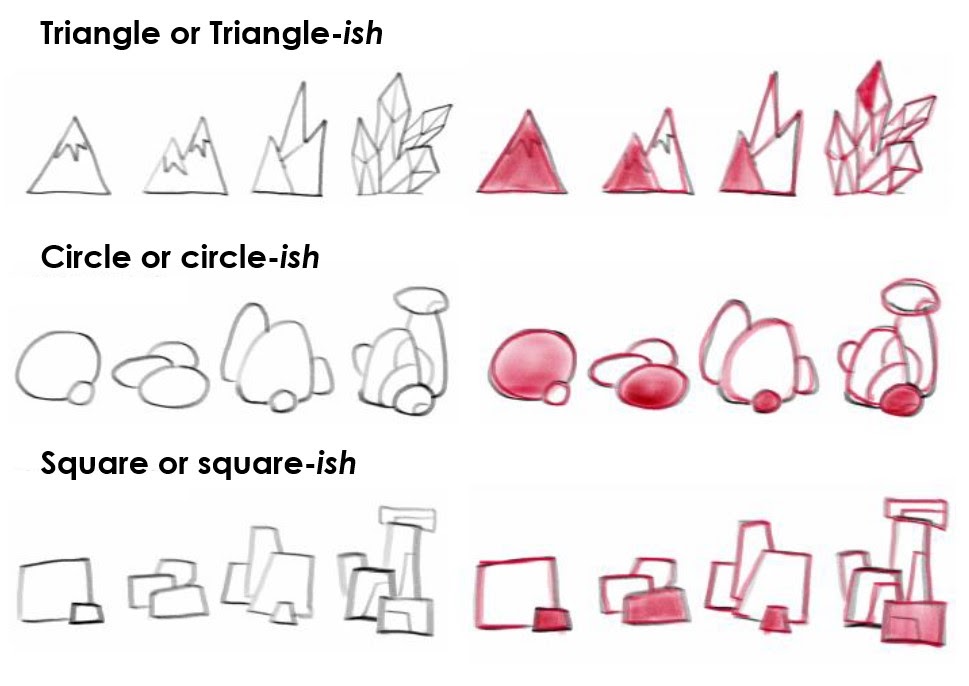
Basic shapes to use when drawing rocks and mountains.
Basic shapes to use when drawing trees (triangle/triangle-ish, circle/circle-ish, and square/square-ish); Courtesy of Creativity Schools’s Advanced Landscape Drawing with Chris Canga
Like how we draw the trees, we also use triangle/triangle-ish, circle/circle-ish, and square/square-ish shapes in drawing rocks and mountains.
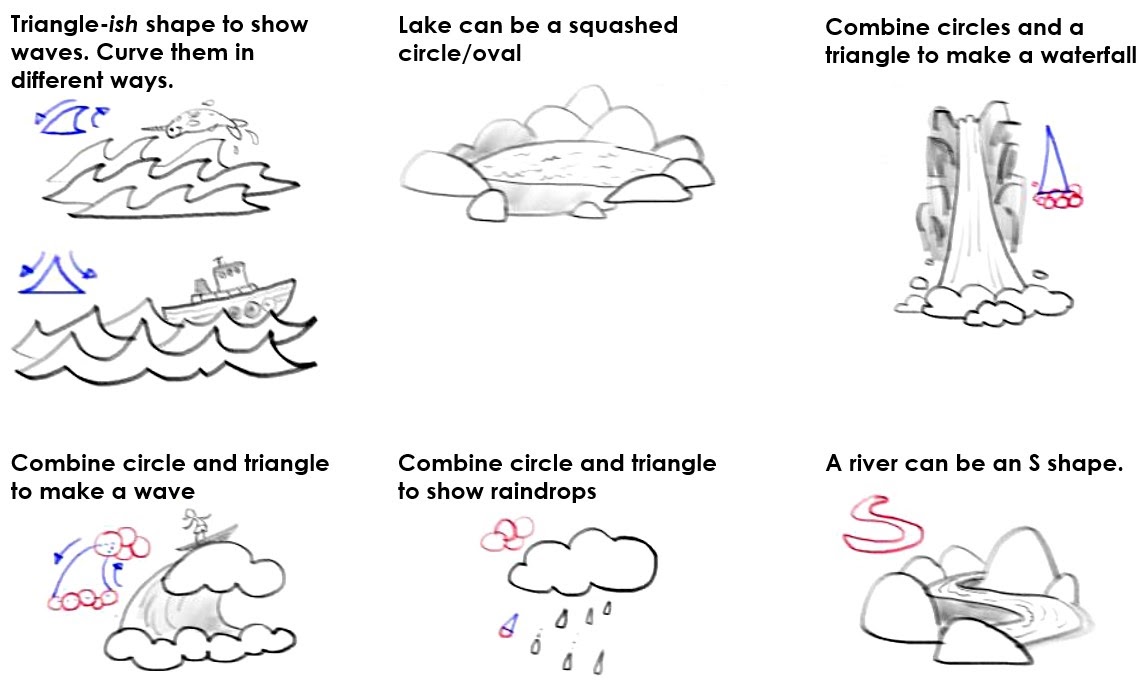
Combine and tweak basic shapes when doing water elements
Basic shapes are changed and combined to draw water elements; Courtesy of Creativity Schools’s Advanced Landscape Drawing with Chris Canga.
Water elements such as waves, rivers, and waterfalls, are a little bit tricky. We change and combine basic shapes to draw them.
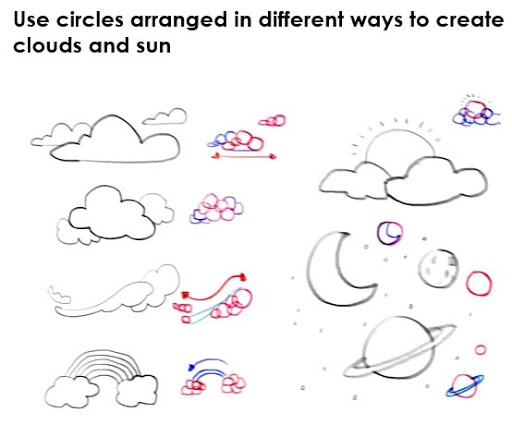
Combine and tweak circles and curved lines when doing sky elements
Circles/circle-ish are changed and combined to draw sky elements; Courtesy of Creativity Schools’s Advanced Landscape Drawing with Chris Canga.
For sky elements such as clouds, rainbows, and sun, we change and combine circle/circle-ish and curved lines to draw them.
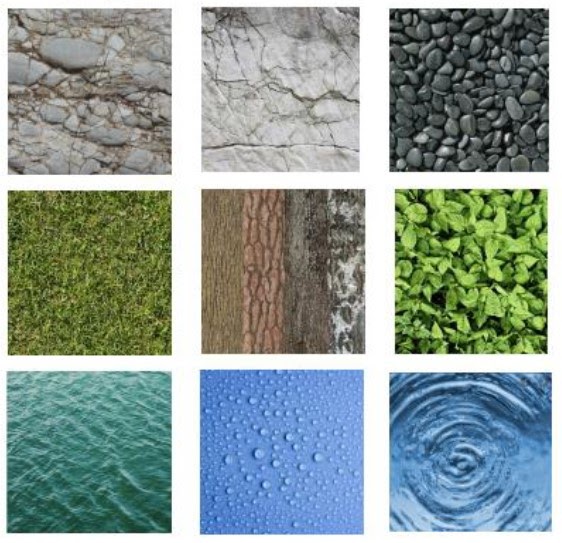
What are textures?
Different textures of three nature elements (rocks/stone, grass/plants, and water).
They are the feeling, appearance, and consistency of a surface.
Use them to fill up the shapes you have created. Textures often create patterns and details.
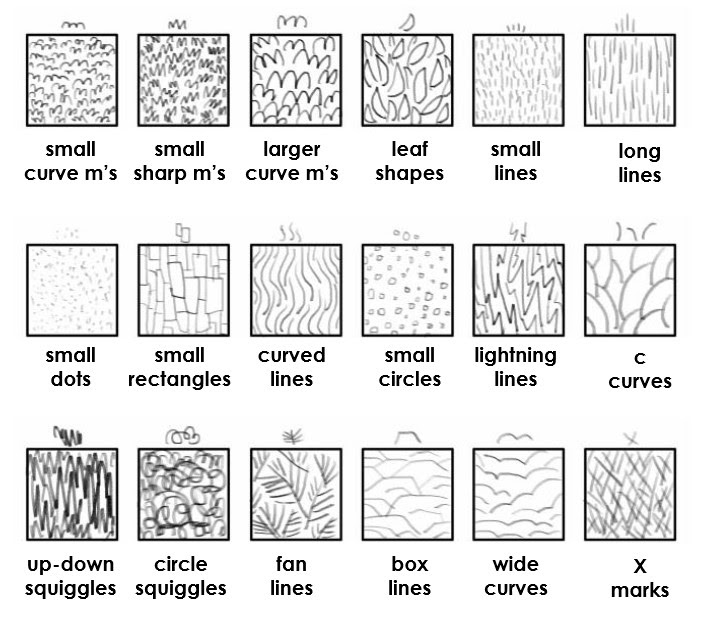
Examples of Textures
Different examples of how textures can be drawn.
Here are some examples of textures that Chris made. These textures will work for many nature elements. The fun part is making up your own textures!
Materials
Copy paper or a sketchbook journal
Pencil 2b
Black ballpoint pen
Sharpie
Rulers
Instructions
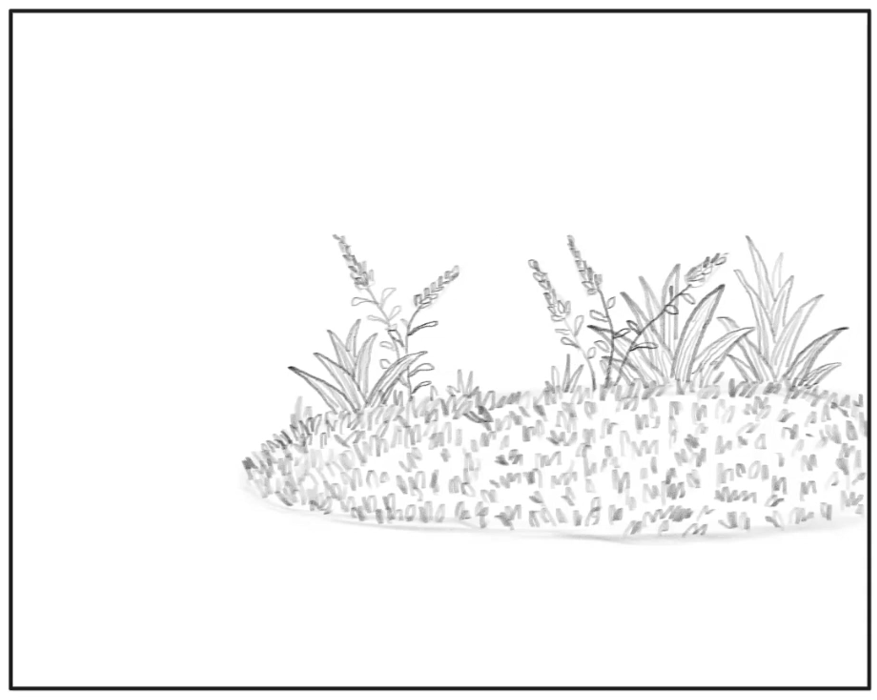
Step 1. Let’s draw plants and grass elements!
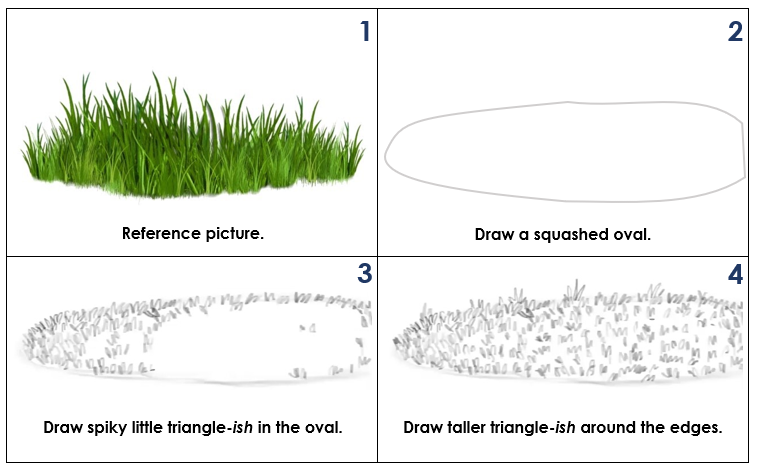
a. Grass cover
First, draw a squashed oval lightly from where you will put the grass.
Next, draw spiky little triangles in the oval. You don’t have to fill the whole oval but make sure that you cover a good portion of it.
Lastly, around the edges of the oval, draw taller triangle-ish shapes for a different texture.
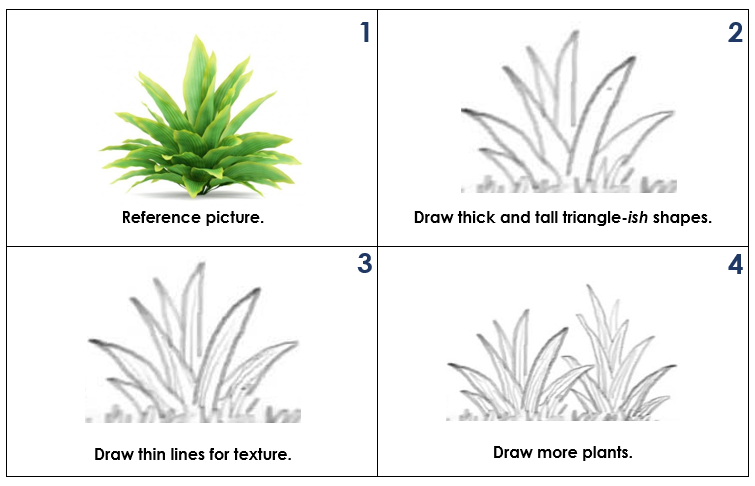
b. Big plants
First, draw and layer thick, fat, and tall triangle-ish shapes on top of each other.
Next, draw small, thin lines for the texture.
Repeat the steps to draw more big plants!
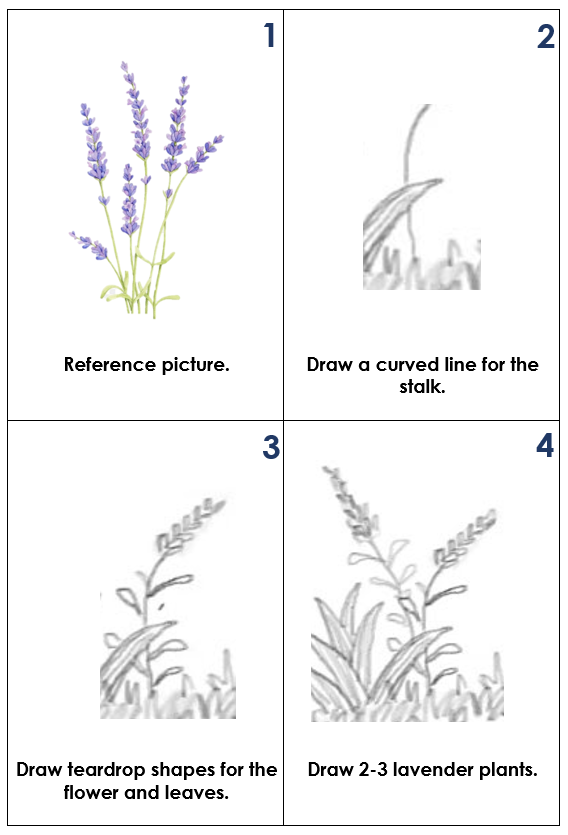
c. Flower
Draw a line for the stalk.
When you look at the flower, you can see that it is actually a triangle with little teardrop shapes inside. On the stalk, draw a triangle lightly, then draw a layer of little teardrop shapes for the texture.
Draw larger teardrop shapes for the leaves.
Draw 2-3 lavender plants.
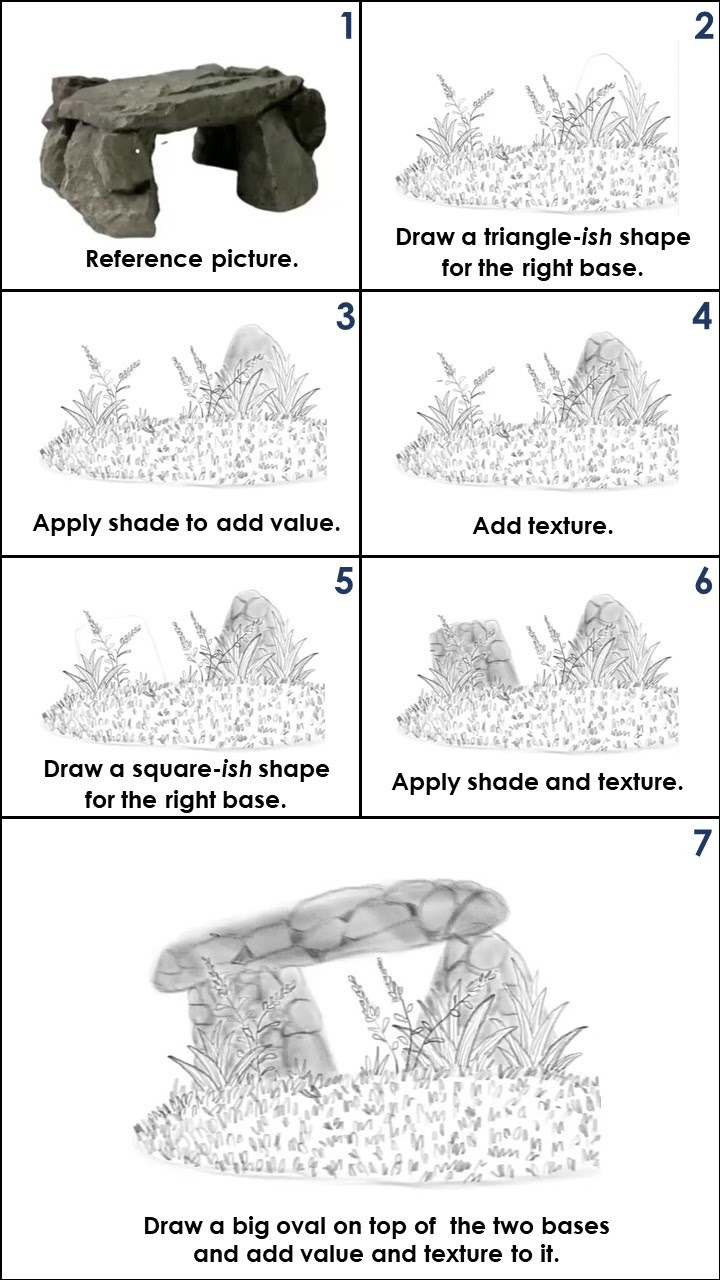
Step 2. Let’s draw rock elements!
a. Big boulder
First, draw a triangle-ish-shaped boulder lightly behind the big plants for the right-side base. Since it is behind, we do not see the whole shape.
Using the side of your pencil, apply a darker shade to the boulder to add value. Do not shade too much to avoid making your drawing dark.
Draw triangle-ish, circle-ish, and square-ish shapes inside the boulder to add texture.
Next, draw a square-ish-shaped boulder lightly behind the lavender for the left-side base.
Similarly, apply a darker shade to the boulder to add value and draw triangle-ish, circle-ish, and square-ish shapes inside to add texture.
Lastly, draw a big oval on top of the two bases and add value and texture.
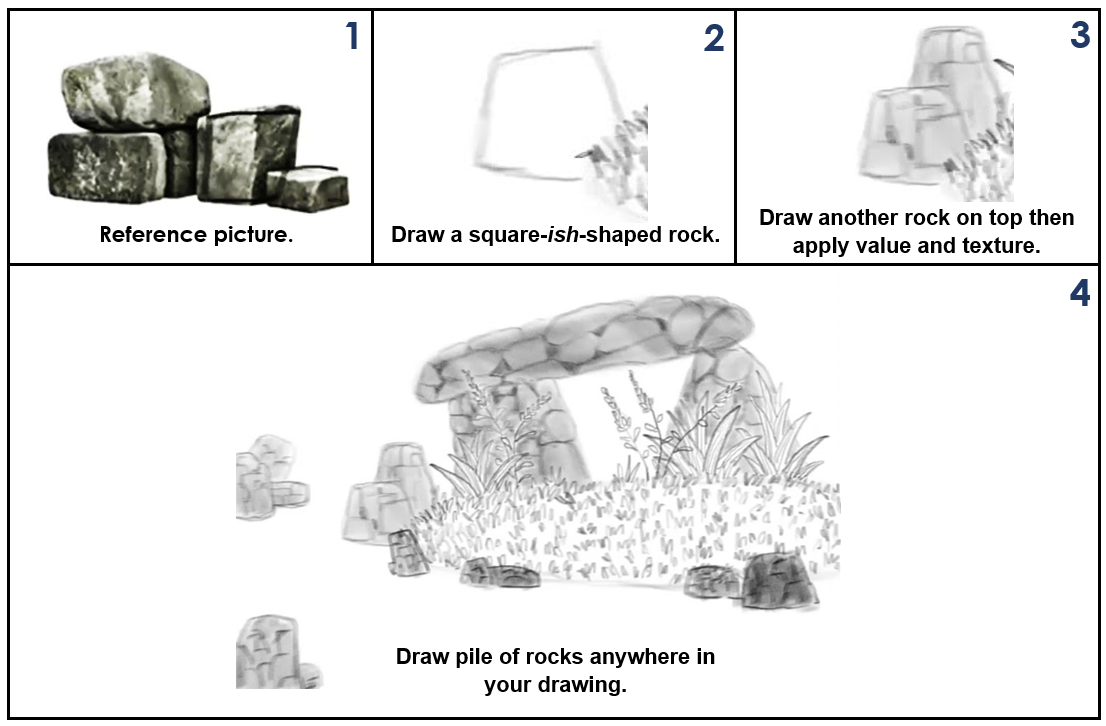
b. A pile of big rocks
Draw a square-ish-shaped rock on the left side of the grass cover. We do not see the bottom part of the rock because it is behind the grass cover.
Draw another rock on top of it. Add value and texture to the rocks.
Practice drawing another pile of rocks to wherever you want in your drawing.
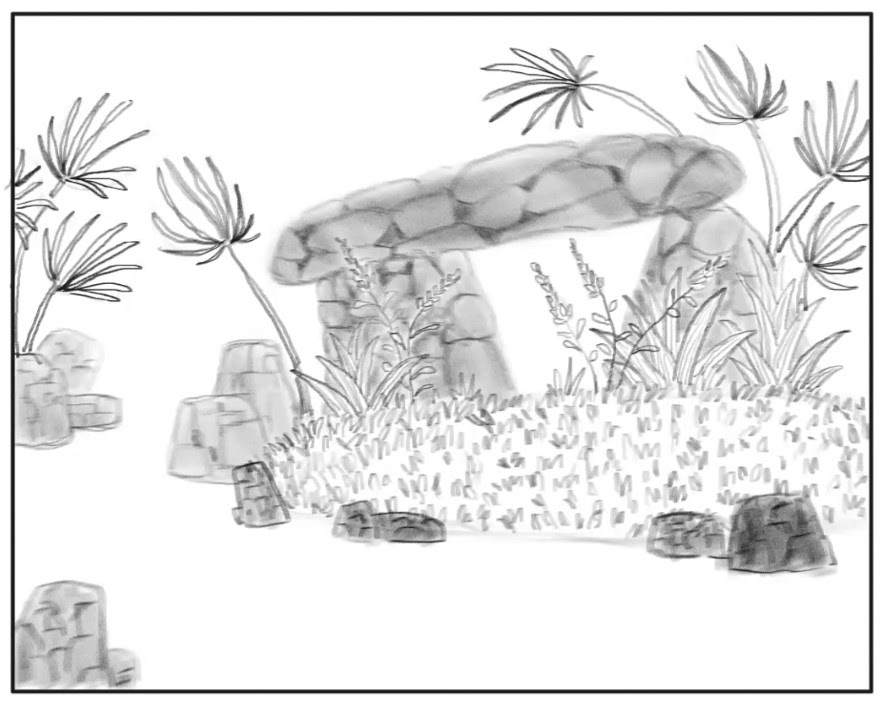
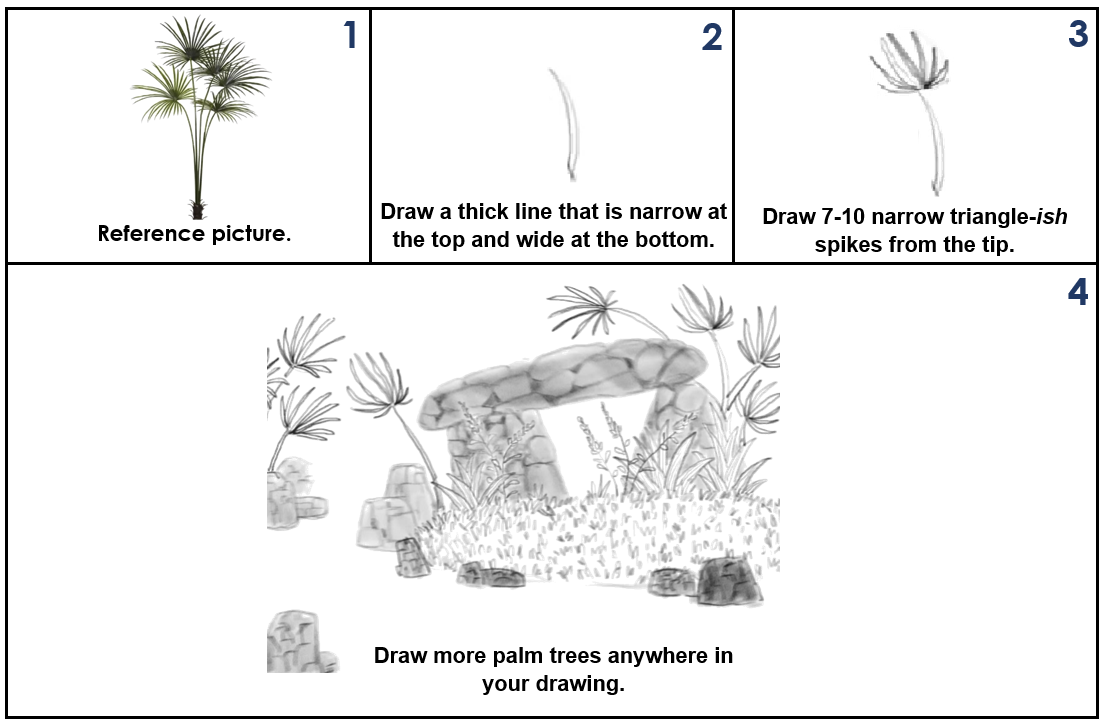
Step 3. Let’s draw tree elements!
a. Palm trees
First, draw a long line that is narrow at the top and thicker at the bottom, behind the boulder. Since it is behind, we can only see the top portion of the palm tree.
Next, draw lightly a large circle at the top, then draw 7-10 narrow triangle-ish spikes inside. When you’re done, erase the circle to get the general fanning of the leaves.
Drawing more palm trees to your desired locations in your drawing.
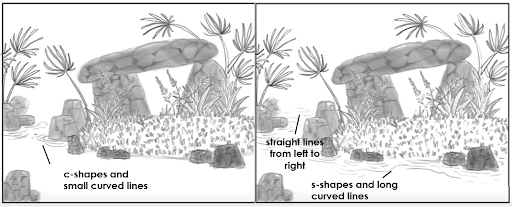
Step 4. Let’s draw water elements!
a. Water ripples
Draw c-shapes and small curved lines on the blank spaces around the rocks.
Draw s-shapes and long curved lines as you draw ripples along the middle.
Draw straight lines from left to right as you draw ripples that are farther away.
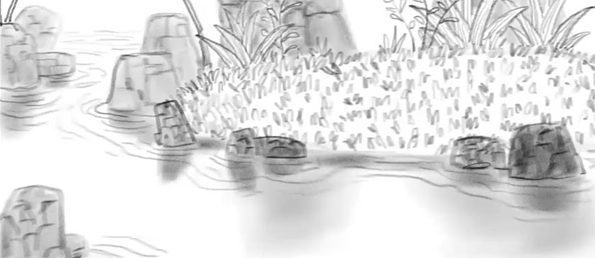
b. Water reflection
Using the side of your pencil, draw a soft blurry shape of the rocks and grass in the water. You don’t have to draw the lines, but remember to maintain the shape of the elements.
Draw a lighter reflection of the boulder in the water. You can darken the reflection of the rocks and grass to make it more visible.
Step 5. Let’s draw the sky elements!
a. Series of clouds
On top of your drawing, behind the boulder and palm trees, draw a combination of circle-ish shapes lightly. Draw smaller circle-ish and oval-ish shapes inside for the texture.
Draw more clouds in the top background.
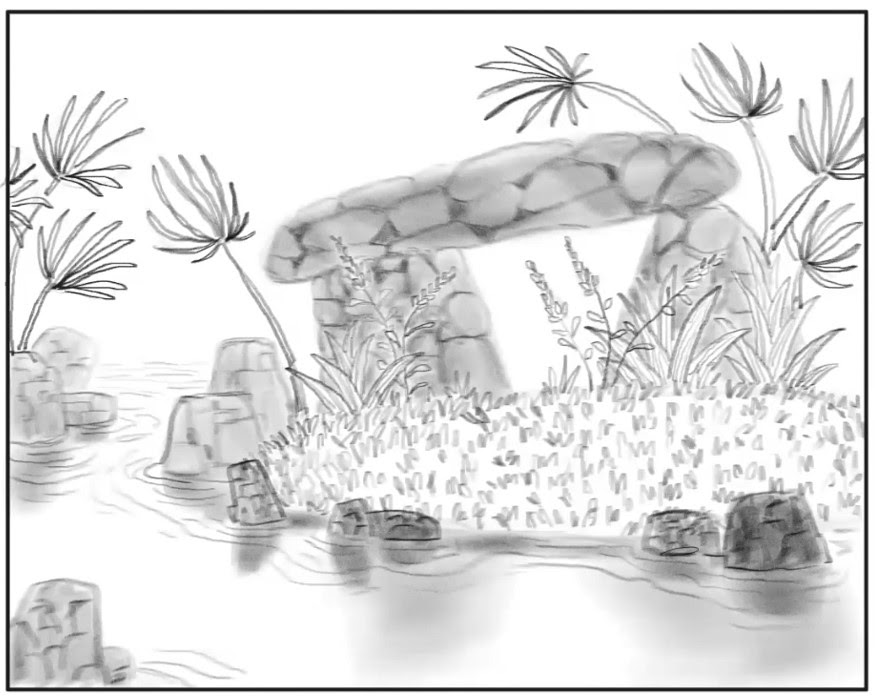
Step 6. Add additional elements!
On the remaining space, draw an oval-ish to square-ish shape for the mountain or hill background.
Do not forget to add a light shade to add value.
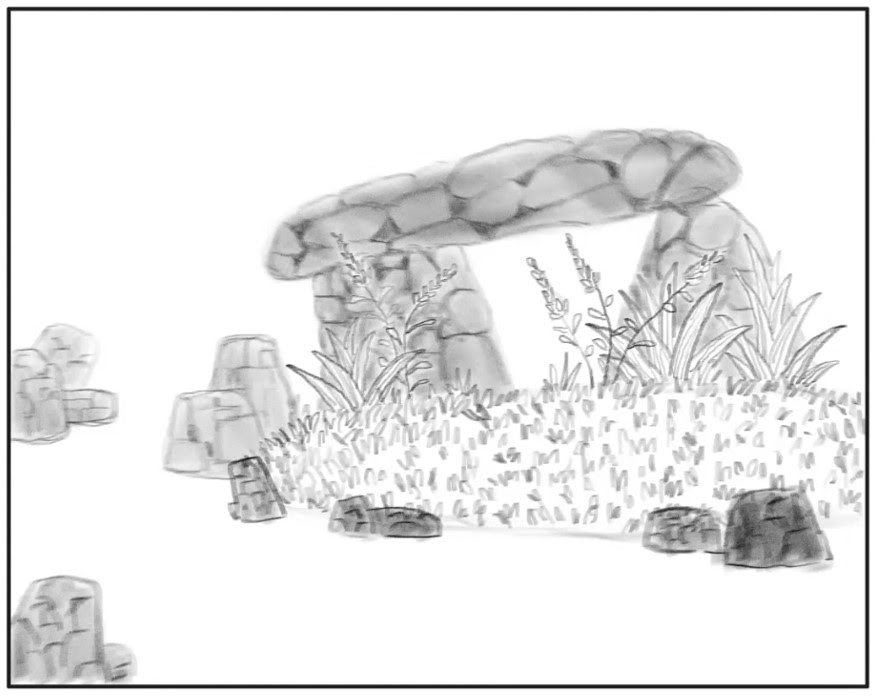
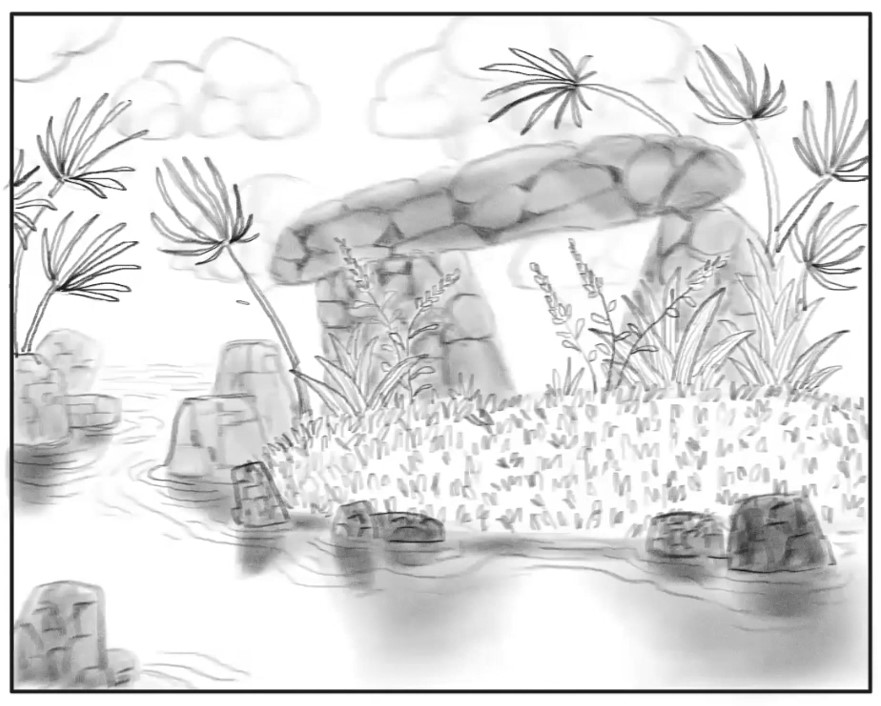
Voila! What beautiful nature scenery you just created!
Tips for art-mazing success:
It does not have to be perfect! It does not matter if your lines appear crooked, and sometimes, it makes your drawings a lot better!
Draw overlapping elements to show depth in your drawing.
You can add a darker value to the small shapes to show a deeper portion of the rock. This will make the other parts of the boulder pop-out.
You can draw while looking at your computer monitor or print this page to see each step in greater detail.
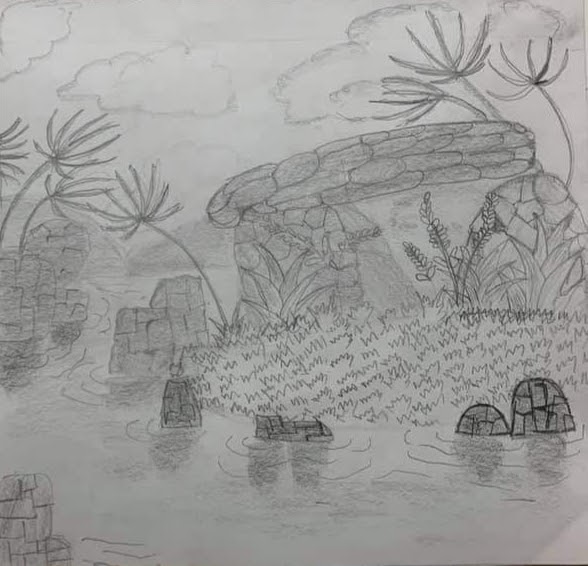
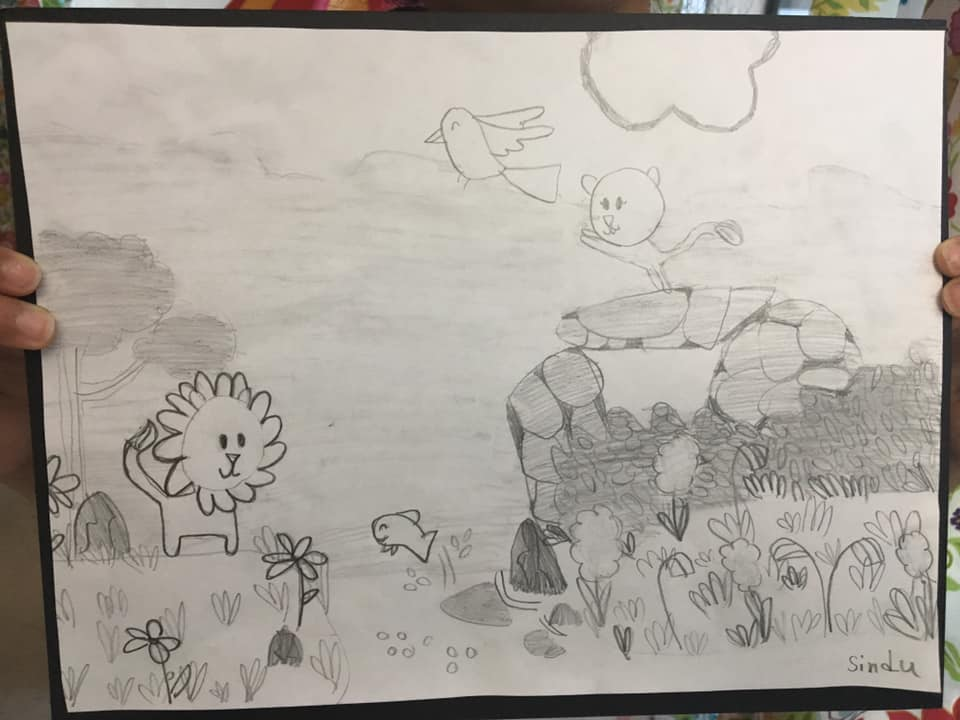
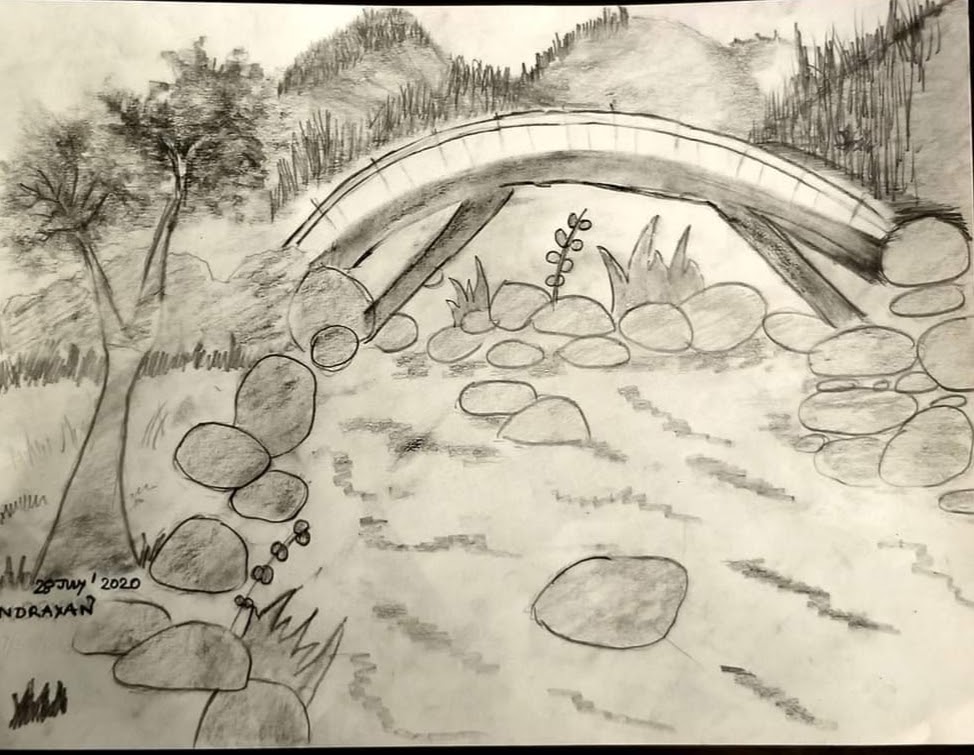
Here are other breathtaking and beautiful nature sceneries created at the Creativity School by our young artists!
Artworks from Creativity School by Shruthi (top left), Sindu (top right), Ava (bottom left), Indrayan (bottom right)
If you love nature and enjoyed this advanced drawing tutorial, share your thoughts in the comment section below.
“We can tell that Creativity School is having a positive impact on my son’s motivation for school and his overall well-being. We know art and creativity are always boosts for academics and health! This is proving it!!!"
- Celina G.
“Arree Chung, your class is fantastic! I am sure other parents would agree that Creativity School is more of a FAMILY DEAL! Because I, as a parent who has no drawing experience, learned too.”
—Miao