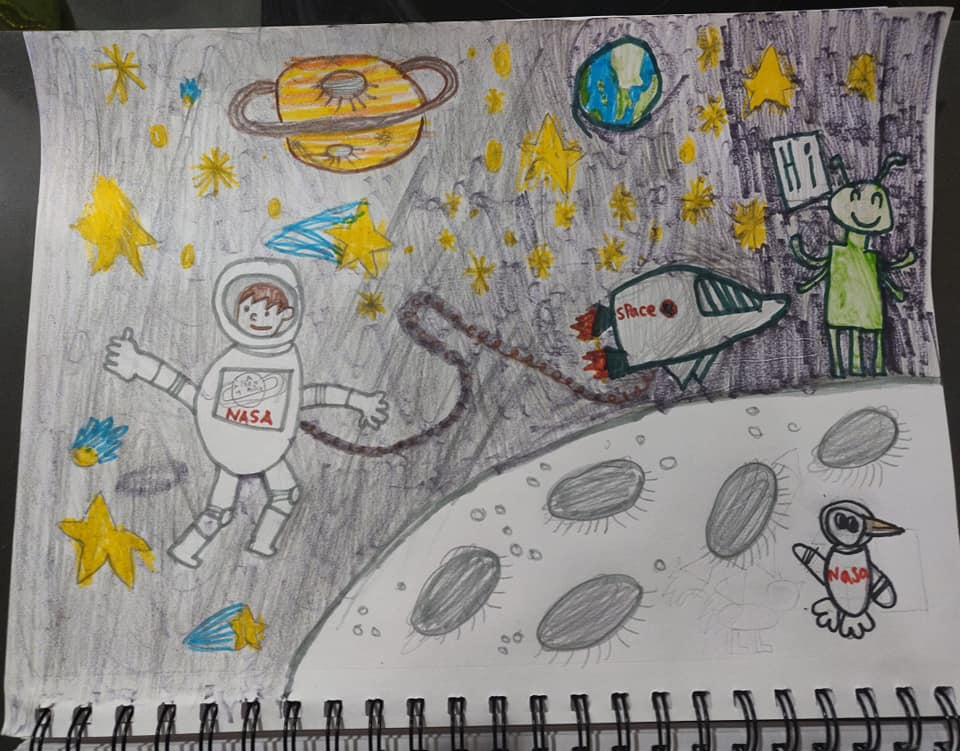
Photo courtesy of Suriya I. (7 years old), student from Creativity School
What is Sight Words, Draw Pictures?
Sight Words, Draw Pictures (SWDP) is our baseline course in the Drawing Track for kids (K-2) at the Creativity School.
The activities in SWDP aims to help our students with basic shapes, the alphabet, letter sounds, small hand skills; as well as develop life skills like independence, comprehension, and curiosity.
With SWDP, kids will (1) learn sight words, (2) draw memorable characters using basic shapes, and (3) write funny stories with simple sentences.
Let's start!
Materials
1 White sheet of paper
Pencil
Colored Pencil
Pen
Eraser
Instructions
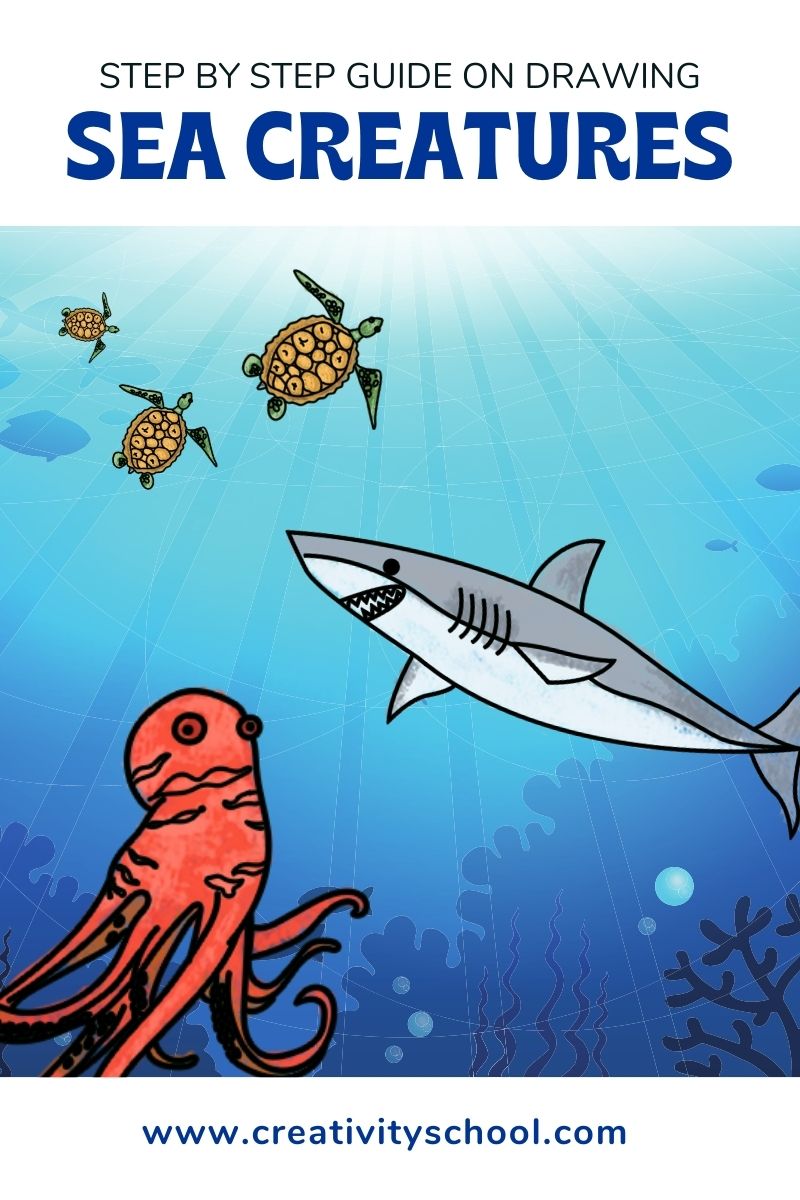
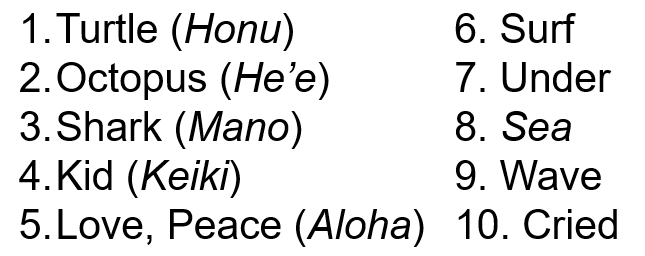
Step 1. Look at the list of sight words.
For this activity, we’ll draw the turtle (honu), octopus (he’e), shark (mano), and wave!
Step 2. Draw these basic shapes: a circle, a square, a triangle, a rectangle, a straight line, and a curved line.
Step 3. Draw animals and objects.
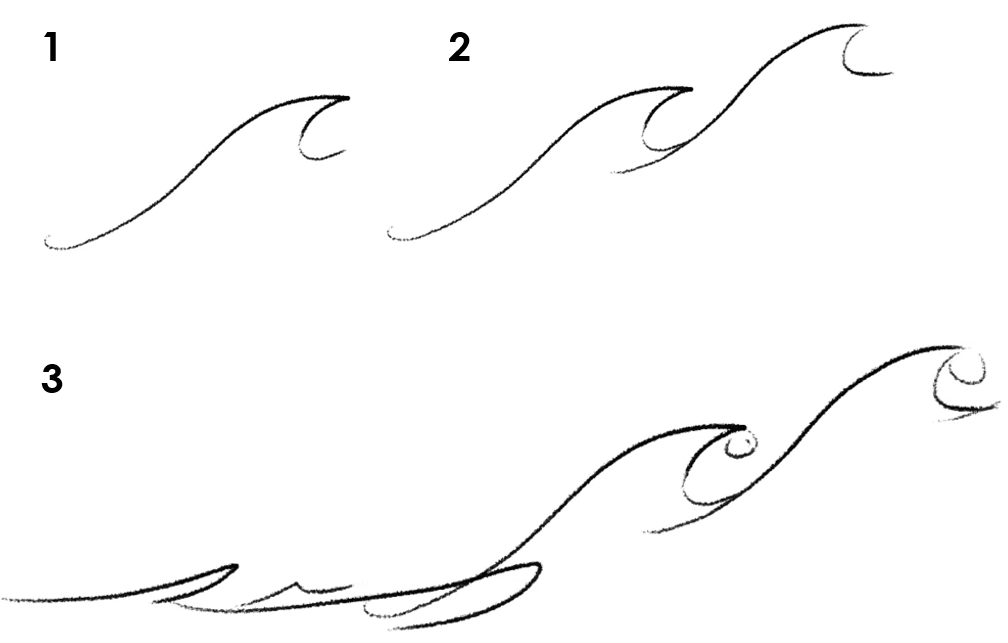
a. Let’s start simple with a wave!
Using the basic shapes, draw a curve line upward and down to a ‘C-shape’
Repeat step 1. Make sure that your wave is in the same direction as the first.
Draw more wave variations.
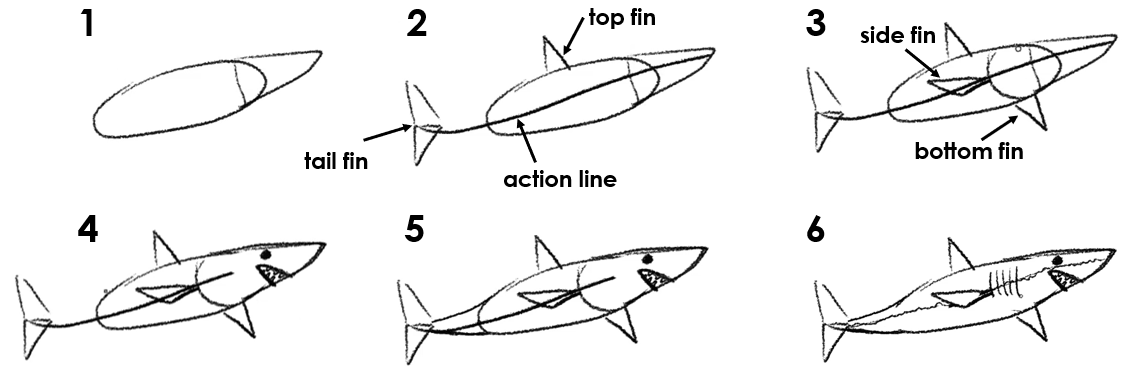
b. Let’s draw a mighty shark (Mano)!
Draw an oval and a triangle for the shark’s head body and head.
Draw an action line from the tip of the triangle across the other side for the length of your shark. This will indicate the movement of your shark. Draw the tail fin and the top fin using triangles.
Using the top fin as a reference, draw the side fin on the middle of the body. Draw another fin at the bottom.
Erase the connecting lines on the head, then draw the shark’s eye and mouth.
Using curved lines, connect the main body to the tail.
Erase the remaining connecting lines. Draw a zigzag pattern across the middle part of the body. Lastly, draw five straight lines in front of the side fin for the gill slits.
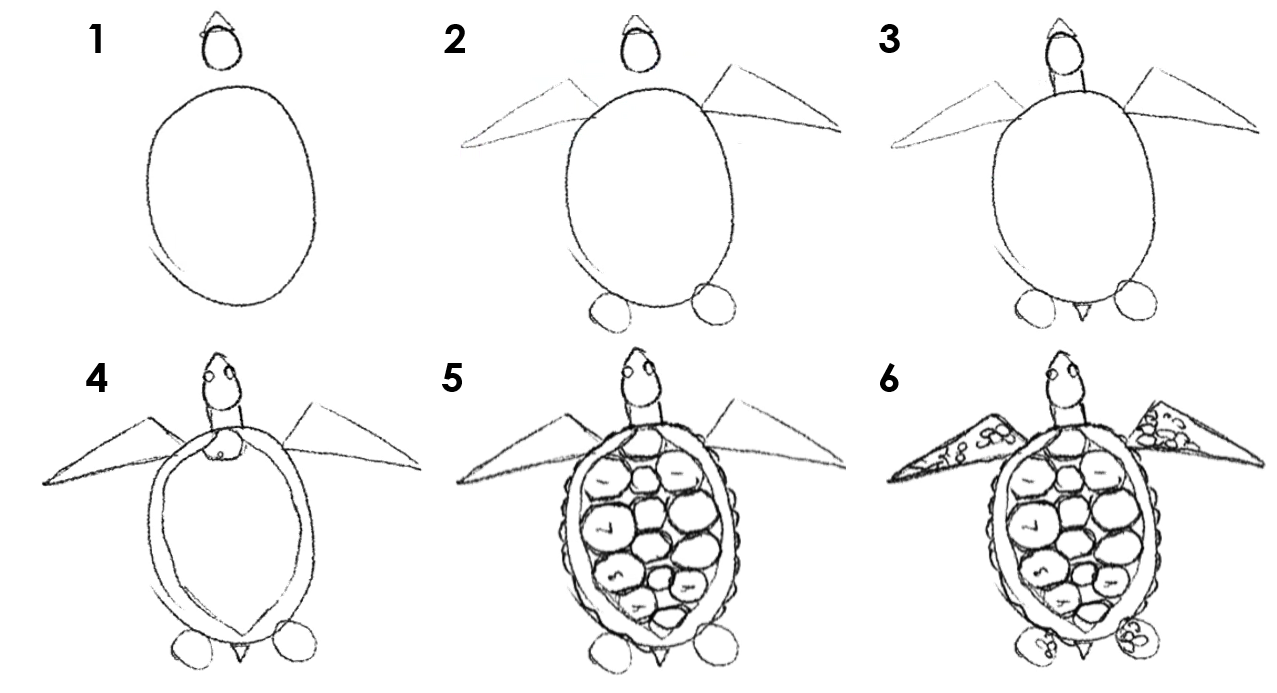
c. Let’s draw a sea turtle!
Draw a large oval for the body and a small circle with a triangle for the head.
Draw two large triangles for the front flippers and two circles for the back flippers.
Connect the head to the body using straight lines, then draw a small triangle for the tail.
Draw an inner oval inside the body for the shell, then draw a small oval at the bottom of the neck.
Continue drawing the ovals. Make larger ovals on the sides and small ones on the middle. Add curves around the edges of the shell.
Draw random small circles on the front and back flippers for the scale.
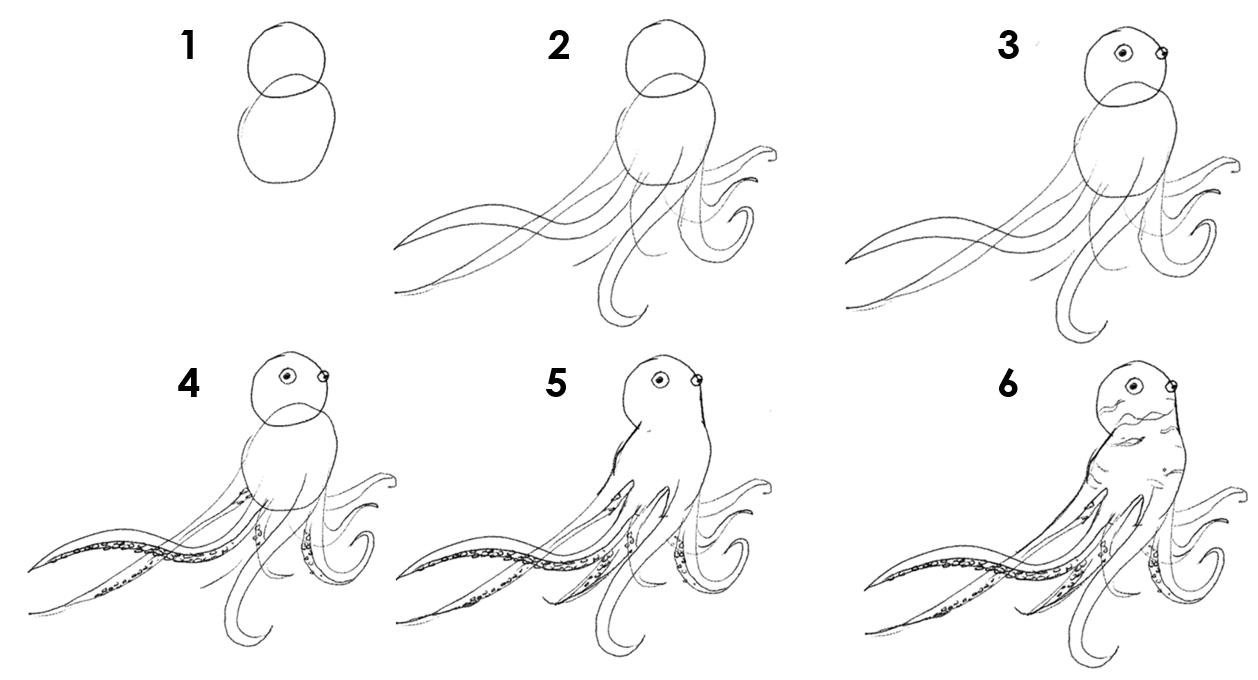
d. Let’s draw the tricky octopus (He’e)!
Draw two circles on top of each other. The upper circle (head) should be slightly smaller than the lower circle (body).
Using curved lines that taper towards the end, draw eight (8) tentacles.
Draw two googly eyes.
Draw a line along the middle of some of the tentacles, then draw small circles on the lower side for the suction cups. (You can use the reference picture because this is a little bit tricky!)
Draw a line from the head to the body then erase the connecting lines.
Add markings for body details.
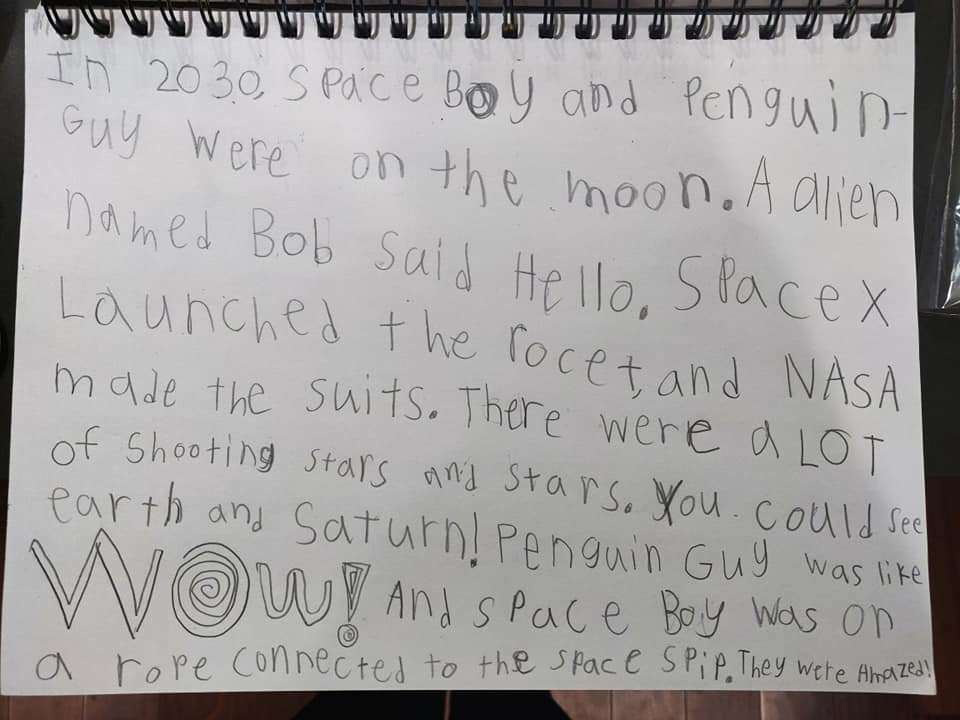
Step 4. Make a story from the words and the pictures.
Once you are done with the drawing, make a wonderful story using all the words on our list!
Tips for art-mazing success:
Continue drawing the other words in the list.
You can explore drawing your characters the way you want to!
Color your drawings.
Add other things to your drawing and make a good story out of it.
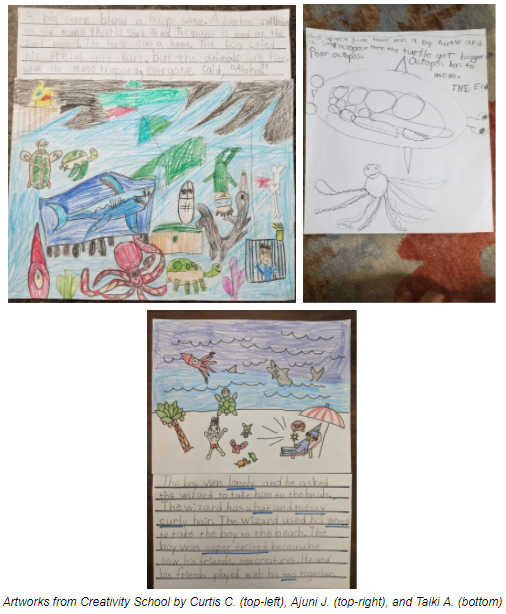
Check out these awesome drawings by our young artists at the Creativity School.
Did you have fun drawing animals and learning about Hawaiian words? Let us know in the comment section below.
Get your FREE printable guide herefor quick and easy access to today’s activity!
Check also these awesome blogs to learn more about Sight Words, Draw Pictures!
“We can tell that Creativity School is having a positive impact on my son’s motivation for school and his overall well-being. We know art and creativity are always boosts for academics and health! This is proving it!!!"
- Celina G.
“Arree Chung, your class is fantastic! I am sure other parents would agree that Creativity School is more of a FAMILY DEAL! Because I, as a parent who has no drawing experience, learned too.”
—Miao