How To Animate the “Floss” Dance Easy Step by Step Tutorial
It's Animation Time again! Learn how to animate the “Floss” dance animation in this easy step by step tutorial.
Animating this viral dance is absolute fun! What more is you'll learn and apply the principles of animations that we taught in our previous blogs.
Have fun animating!
Recent Posts
Learn How To Animate at Creativity School!
Let’s begin the animation journey of your kids and enhance their creative potential this 2021!
Our award-winning artists give away free LIVE art classes from the Creativity School.
Learn how to make animations, pop-up cards, draw ninjas, characters, paint, and much more!
What is “Floss” Dance?

The Floss is one of the latest dance crazes among kids!
The act of ‘flossing' is a unique dance move that involves fast arm and hip swings like a huge, invisible piece of dental floss. It's sure to be a load of fun!
It gained popularity on a lot of social media when Russell Horning, known as “the backpack kid”, performed it alongside Katy Perry in one of her guest appearances in Saturday Night Live in 2017.
Since then, it is a popular dance move among kids, younger teens and has been performed by many celebrities in videos online!
How to do the “Floss” dance?
Floss dance is relatively easy and really fun to do and watch! So turn the music on, and let's dance to the beat!
To floss, you need to swing your hips in the opposite way to your arms and then back again, and then repeat on the other side.
Step 1. Relax and stand straight with feet slightly apart.
Step 2. Swing your straight arms to the left while swinging your hips to the right.
Step 3. Keep your arms straight, then swing them back towards the center, then to the right, with one arm finishing in front, the other behind, while swinging your hips to the left at the same time.
Step 4. Repeat step 3 by moving your arms to the left and hips to the right in one movement.
Step 5. Repeat all the above steps with increasing speed!
Now that you know how to flash those moves let's learn how to animate them!
Let’s Animate the “Floss” Dance
Let’s have fun and make our floss dance animation!
Watch also our quick video tutorial and see how to create animation in a flipbook and in FlipaClip!
Materials
- 12 pieces of small rectangular papers
- 1 pencil/pen
How To Animate the “Floss” Dance (Overview)
Step by Step Instructions
I. Making our flipbook
If you do not have a pad of paper for our animation, we can make our very own flipbook!
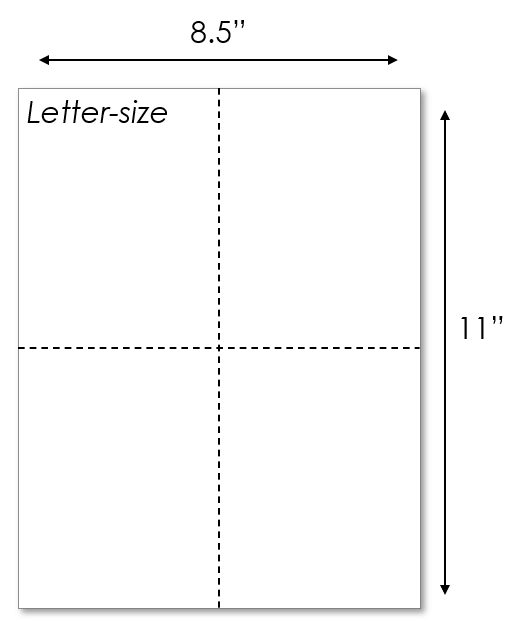
Step 1. Fold and cut a paper (letter size) in four equal parts.

Step 2. Divide 2 more papers into 4 parts each, then number all the cut papers at the upper right corner from 1-12.
II. Drawing the frames
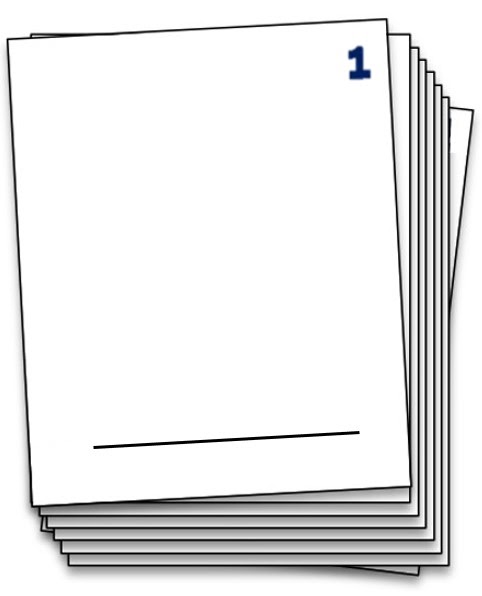
Step 1. On all 12 frames, draw a reference line at the bottom of each.
This will be the “ground” from where we will animate our character to do the “floss” dance.
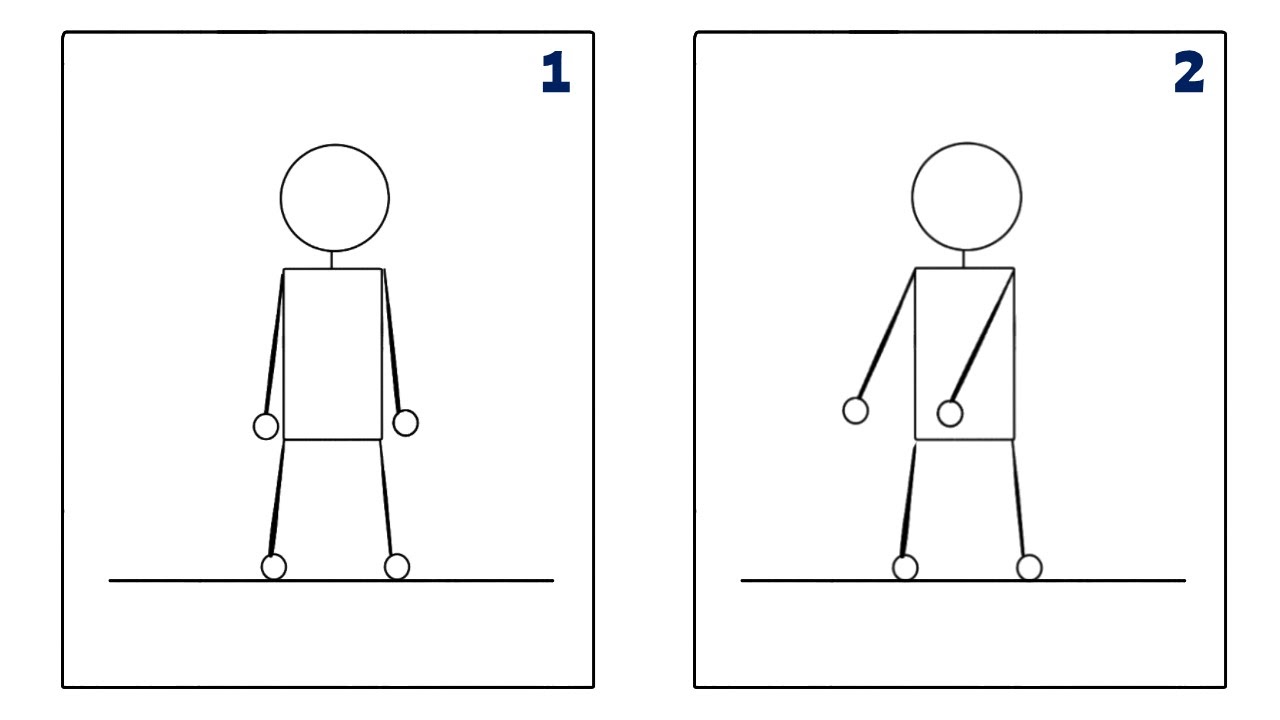
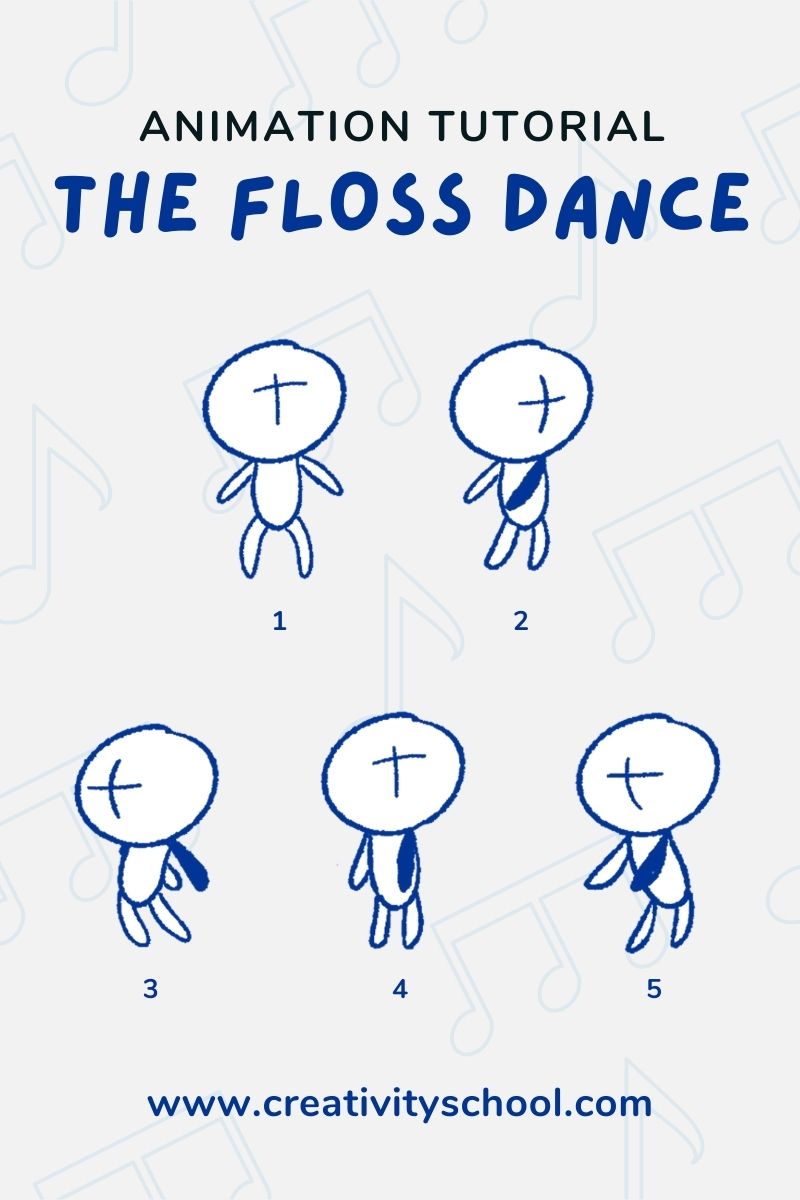
Step 2. Draw Frames 1 and 2.
For Frame 1, let's start by drawing our character in a standing position.
We're going to use basic shapes for you to see and understand the movement better. Draw a circle for the head, a rectangle for the body, lines for the arms and legs, and circles for the hands and feet.
Let's draw our character's movements based on our point of view.
For Frame 2, our character moves its arms to the left. Draw the arms shifted to the left in front of the body. Keep in mind that the feet stay in place while the legs follow the direction of the hips.
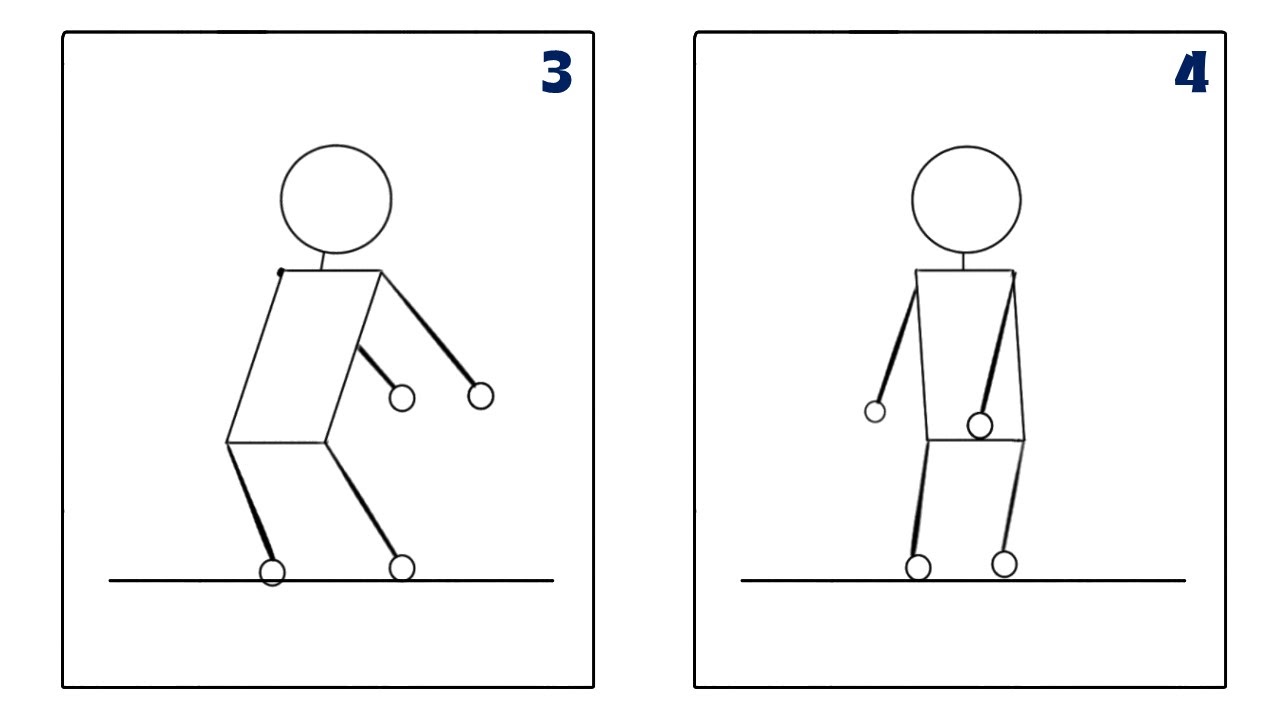
Step 3. Draw Frames 3 and 4.
For Frame 3, our character swings its hips to the left and its arms to the back. Draw the hips and legs bent towards the left. Draw the arms pointed to the right. Since the left arm is at the back, draw only a part of it on the side of the body.
For Frame 4, our character starts to swing back its arms to the front. Draw the arms slightly shifted to the left. Inversely, draw the body with the hips turned somewhat to the right.
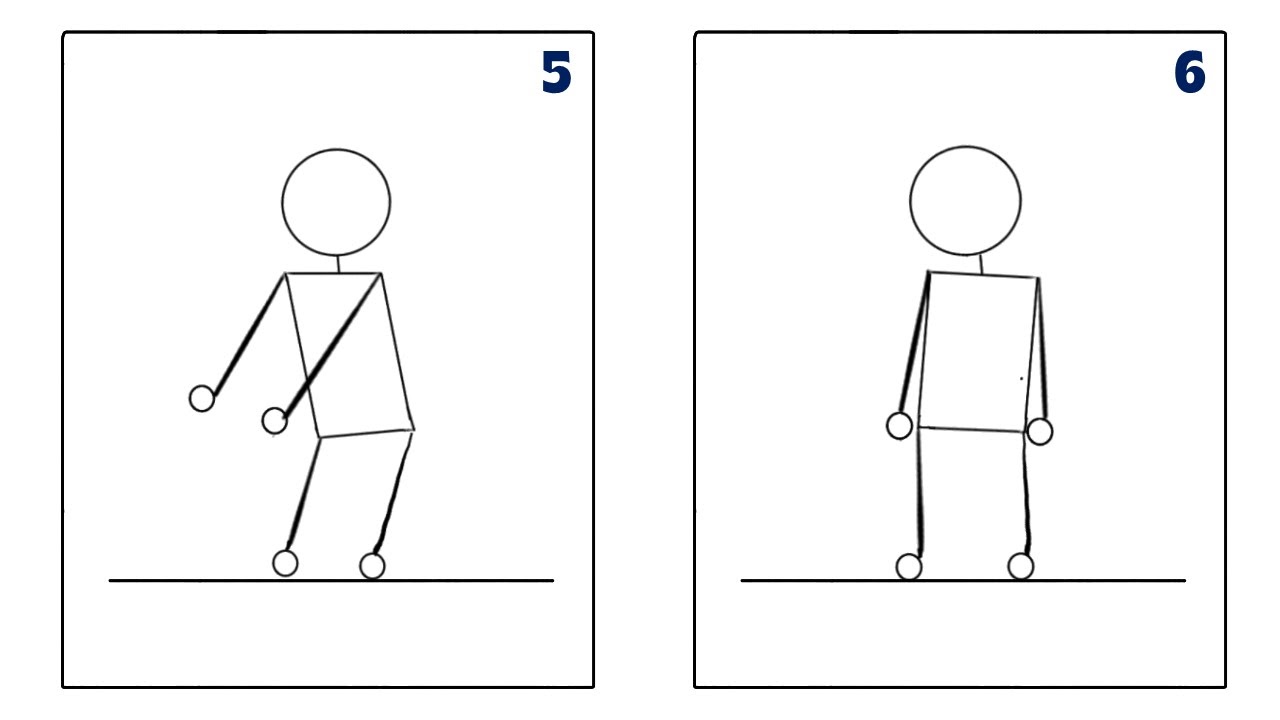
Step 4. Draw Frames 5 and 6.
For Frame 5, our character fully swings its arms to the left. The drawing is similar to that in Frame 4, but the arms are more pointed directly towards the left, while the hips are right.
For Frame 6, our character goes back to its resting position. Draw the arms along the middle while the hips are slightly shifted to the left.
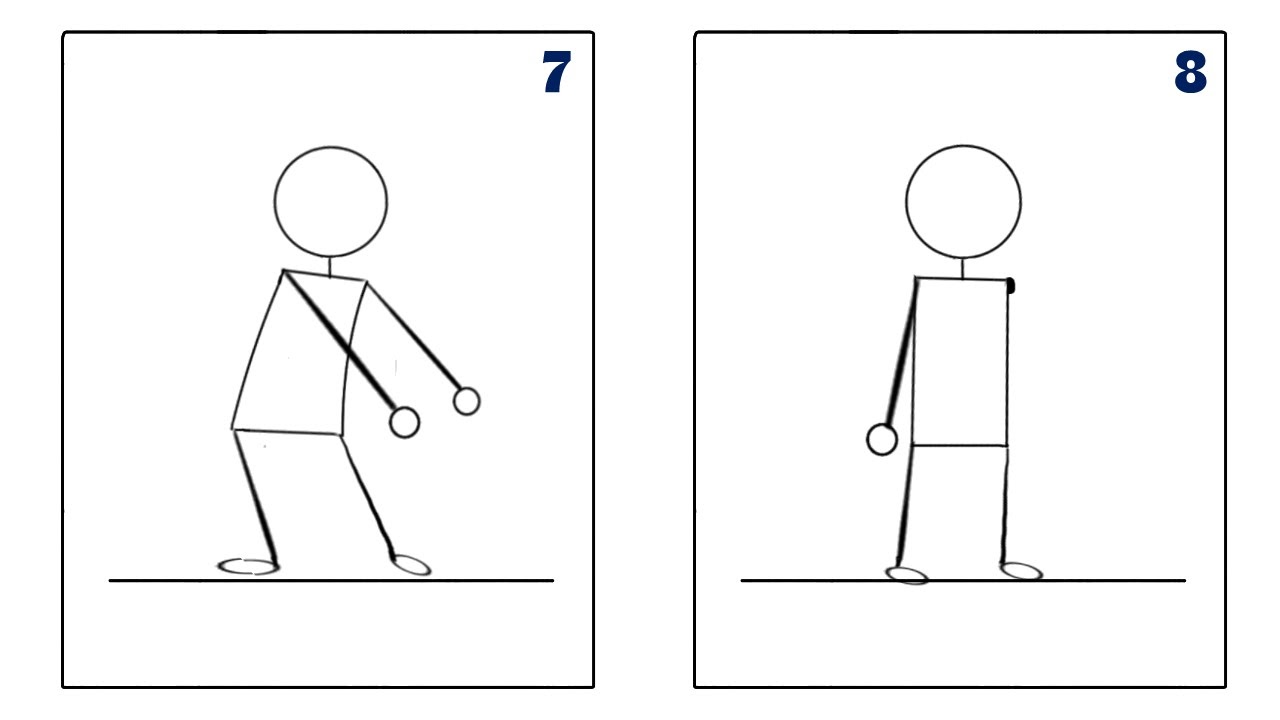
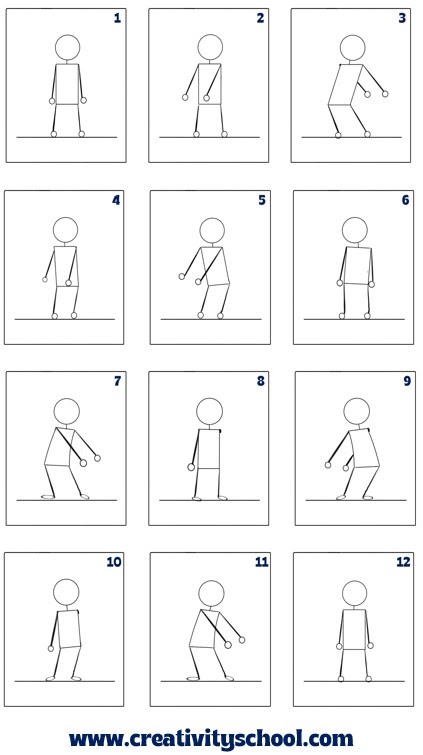
Step 5. Draw Frames 7 and 8.
For Frame 7, our character swings its body to the left and its arms to the right. The drawing is similar to Frame 3, except the left arm is in front of the body.
For Frame 8, our character starts to swing its hips to the right and its arms to the back. Draw the left arm and the body along the middle. Draw a dot beside the shoulder to indicate that the right arm is at the back of the body.

Step 6. Draw Frames 9 and 10.
For Frame 9, our character fully swings its hips to the right and arms to the left. Draw the hips and the legs like they are bent to the right. Draw the left, and right arms pointed to the left. Since the right arm is at the back, draw only a part of it on the side of the body.
For Frame 10, our character is going back to the resting position. The drawing is similar to Frame 8.
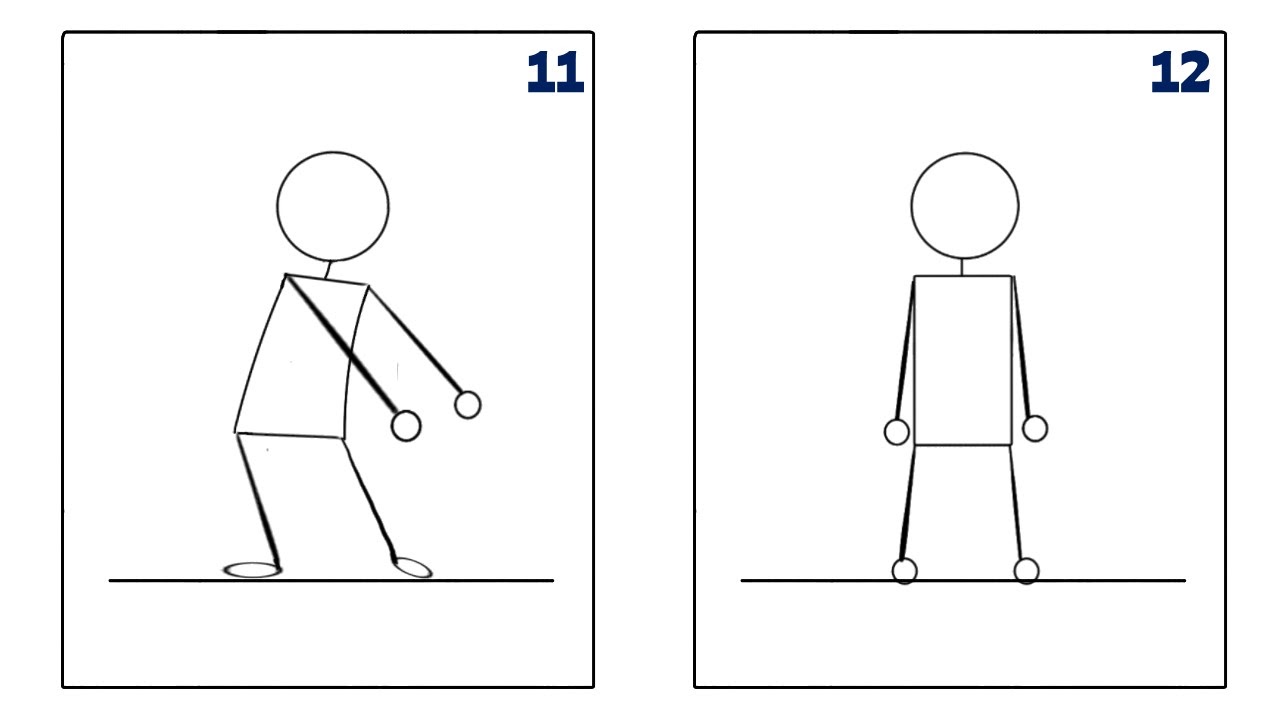
Step 7. Draw Frames 11 and 12.
For Frame 11, our character swings its arms again to the left. The drawing is similar to Frame 7.
For Frame 12, our character goes back entirely to its resting position. The drawing is similar to Frame 1.
Step 8. Flip it!
Arrange the cards with 1 at the bottom and 12 on top, then flip. You'll see your character do the floss dance!
Wow! Your character sure is having fun! Great job!
Tips for art-mazing success:
- If you want to do it digitally, try FlipaClip. It is an amazing app where you can do your animation just like a flipbook.
- Use bigger shapes to add depth to your character! Instead of lines for the arms and legs, you can use ovals or rectangles to make it more realistic.
- You can also add details and colors to your character to increase its appeal!
Here are other floss dancing animations made by our young artists at the Creativity School.
“Floss” Dancing Animations from Creativity School by John G. (top-left), Angela G. (top-right), Aidan S (bottom-left), and Anushka S. (bottom-right)
Share with us in the comment section below your floss dance animations!
Be part of our Creativity School to know more about animation and other fun activities.
Here are other awesome blogs about the basic principles of animation filed with cool animation activities!
Creative Kids Live
- Celina G.
On Demand Class
—Miao