Watercolor Art: How to Make A Color Wheel
Today, we will experiment with different colors and learn how to make a color wheel using watercolors.
Watercolor painting is a fun art activity that kids love. It’s so simple and easy to do.
Bring out your brushes and get those craftsy fingers ready!
Recent Posts
Table of Contents
Learn more about Watercolor Painting at Creativity School!
Let’s begin the creative journey of your kids and enhance their potential this 2021!
Our award-winning artists give away free LIVE art classes from the Creativity School.
Create fun and crafts like collages, animations, pop up cards, and much more!
What is a Color Wheel?

Whether using crayons, watercolors, or colored pens, kids are always excited about mixing and creating different colors.
We use a color wheel to know more about colors, color combinations, and what colors look good together.
There are 12 colors on the color wheel divided into primary, secondary, and tertiary colors.
PRIMARY COLORS
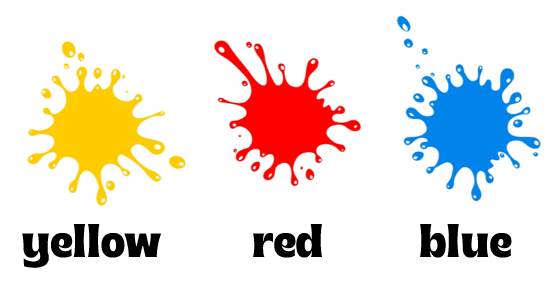
The primary colors are YELLOW, RED, and BLUE. These are the foundation colors that you have in the color spectrum.
You can use those colors to make any color that there is, like all the colors in the rainbow.
SECONDARY COLORS
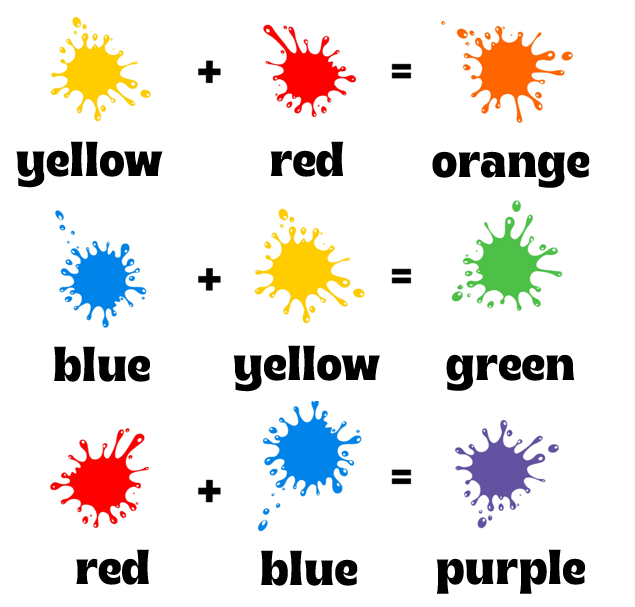
The secondary colors are ORANGE, GREEN, and PURPLE.
These are made by taking two primary colors in equal parts and mixing them.
TERTIARY COLORS
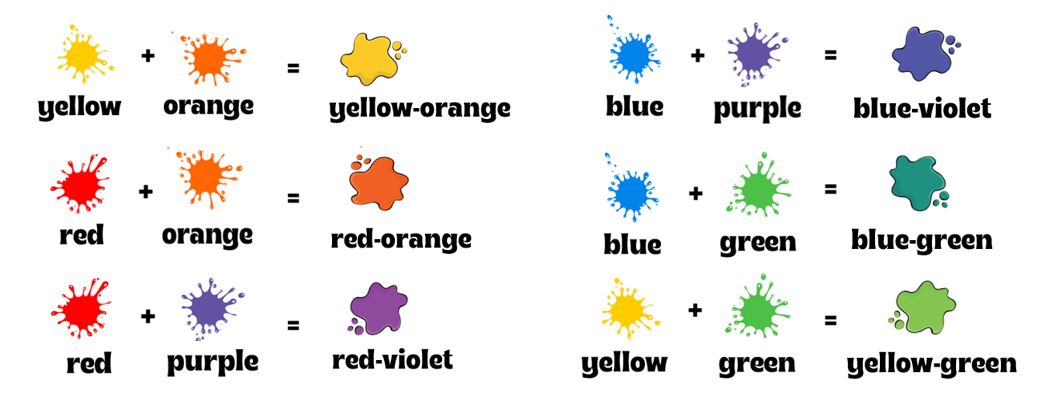
The tertiary colors are YELLOW-ORANGE, RED-ORANGE, RED-VIOLET, BLUE-VIOLET, BLUE-GREEN, and YELLOW-GREEN.
Mix equal parts of one primary color and one secondary color to make the tertiary colors.
How to Make a Color Wheel
Ready to make this watercolor color wheel?
Let’s chime in!
Materials
- Small/Medium Watercolor Paper
- Watercolor Paint Set (Palette or tubes)
- 2 to 3 cups of water
- One plate for mixing (Don’t use paper plates or dark plates)
- Paint Brush
- Pencil
- Eraser
- Ruler
- Paper Towel
Instructions
A. Make the base of the color wheel.
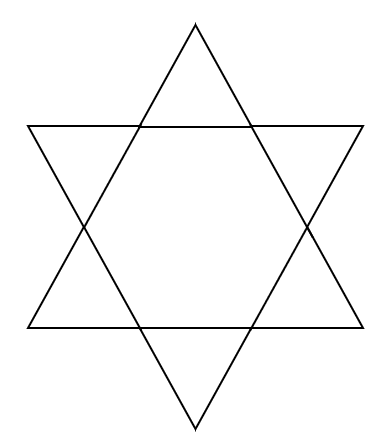
Step 1. Draw a big triangle and an inverted triangle on top of the other.

Step 2. Draw circles on the corners of the first triangle.
We’ll paint our primary colors in these circles.
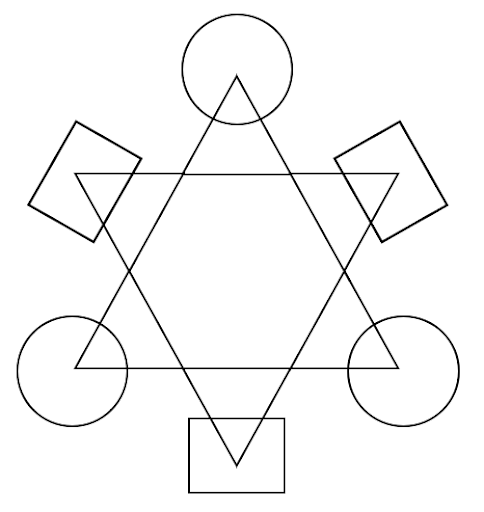
Step 3. Draw rectangles on the corners of the inverted triangle.
We’ll paint our secondary colors in these rectangles.

Step 4. Draw triangles in between the squares and the circles.
We’ll paint our tertiary colors in these triangles.
B. Watercolor Painting Time
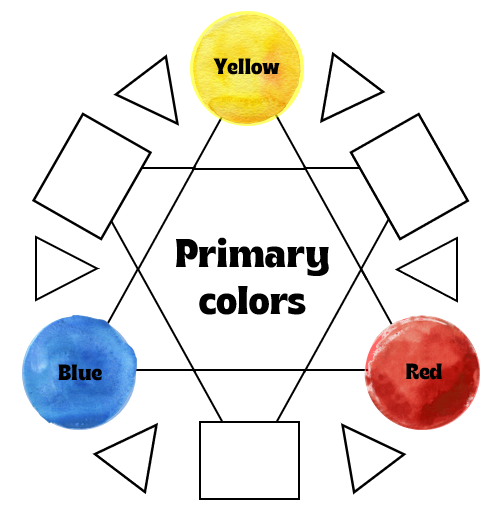
Step 5. Paint primary colors on the circles.
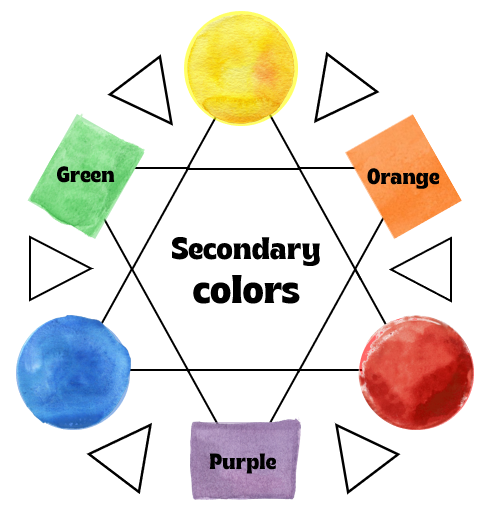
Step 6. Paint secondary colors on the rectangles.
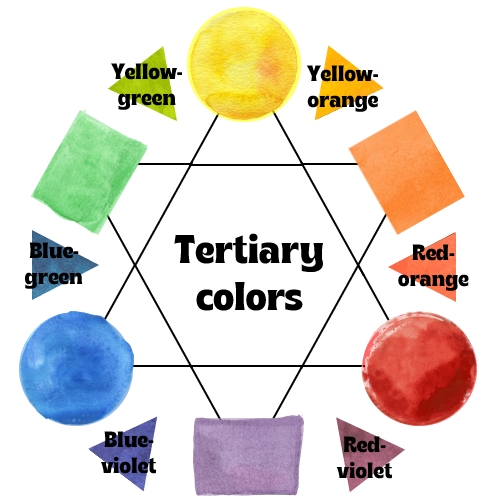
Step 7. Paint tertiary colors on the triangles.
Tadah!
You’ve just made your colorful color wheel!
Tips for art-mazing success
- Don’t be afraid to get messy! It’s part of our learning!
- Use a medium amount of wetness in your brush to make the watercolor look nice, rich, and solid.
- Red spreads out real fast compared to Yellow and Blue. Use a little amount of red when painting and mixing.
- Mixing Purple is the hardest compared to Green and Orange. Don’t be frustrated! Just enjoy practicing!
Check out some bright and colorful creations by our young artists at the Creativity School.

If you enjoy our activity today, we’d love to see your color wheels! Share it to us by leaving a comment below.
Stay up-to-date with the latest painting activities for your family at Creativity School!
Creative Kids Live
- Celina G.
On Demand Class
—Miao
Related Blogs
It seems we can't find what you're looking for.

1 thought on “Watercolor Art: How to Make A Color Wheel”
Best view i have ever seen !