How to make a pop-up card

How to Make a Pop-Up Card for Kids

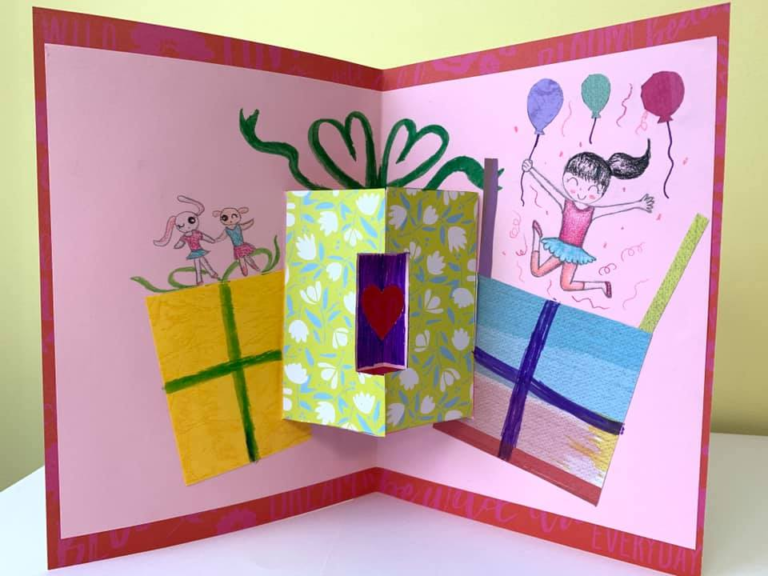
Whether you're a kid or an adult, something magical happens when you open a pop-up card and it explodes into magnificent 3-D life. Now you can learn how to make a pop-up card yourself!

They might seem complicated, but pop-up cards are actually easy to make. The magic comes from folds of paper and smartly placed cuts. They're a great hands-on craft project to do with your child, and something that even young elementary school kids can learn!

Making pop-up cards engages children's minds in a variety of ways. They have to think a few steps ahead to see how the folds and cuts will impact their design, use fine motor skills to make the cuts and folds, and use spatial reasoning to try and see the bigger picture of the design. After constructing the pop-up part of the card, kids can take ownership of their design by drawing their own decorations and flourishes.

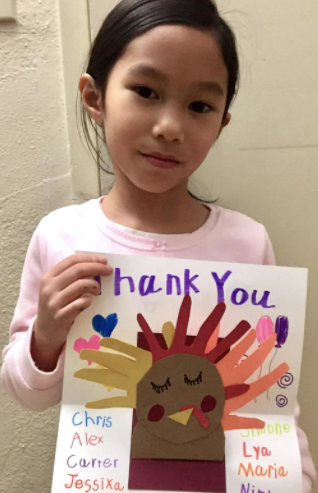
After your child makes their first pop-up card, they’ll have a solid base that will give them the knowledge and skills they need to create their own pop-up card designs! And as a bonus, your child will have a gift that they can give to someone special in their life to say, “Thank you,” or “I’m thinking of you.”

Let’s get started!

Supplies:

1 piece of white cardstock or construction paper

1 piece of thick colored paper (any color)

1 pair of scissors

1 pencil of any type

1 set of colored markers

1 glue stick

Steps:

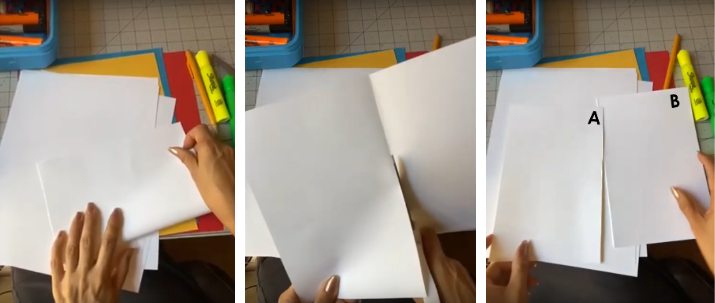
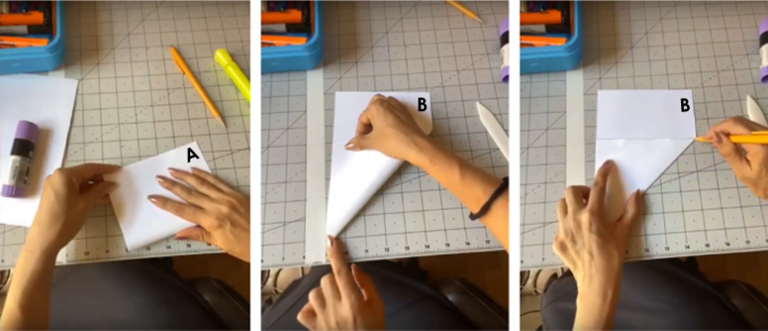
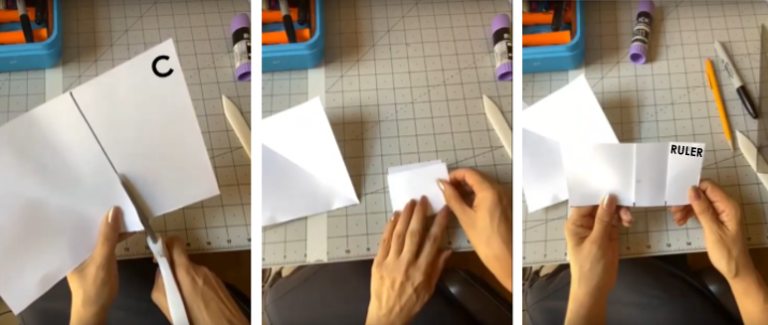
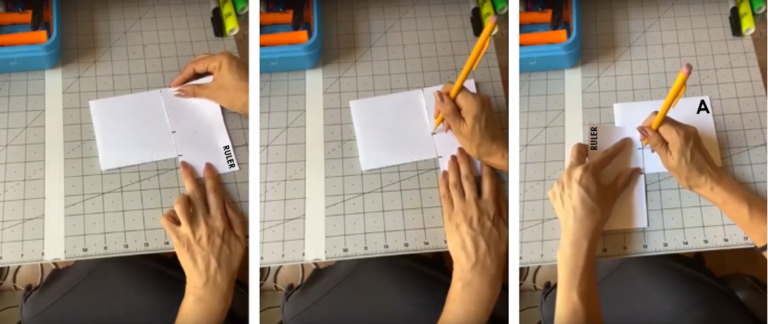
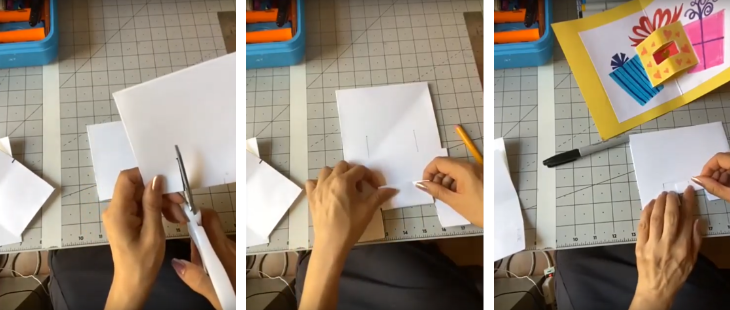
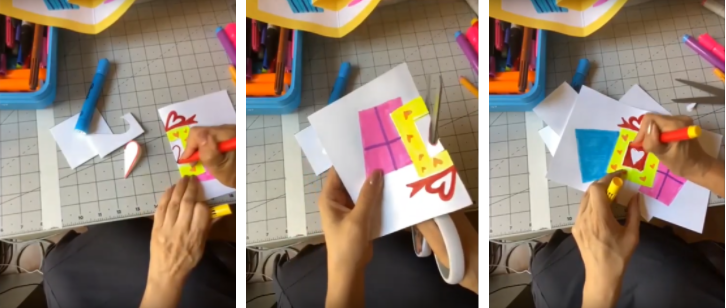
  1. Fold one piece of thick white paper crosswise, then carefully cut along the crease. Label the two pieces as A and B.

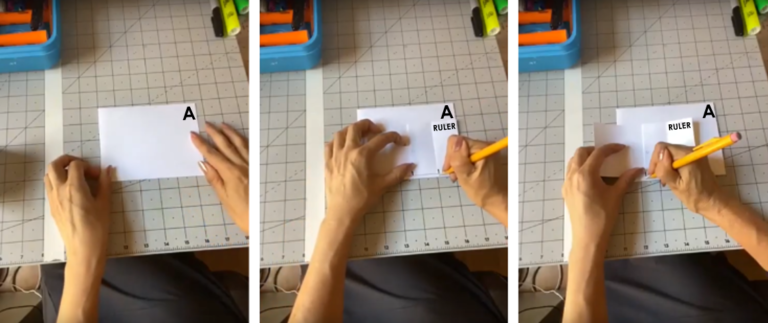
Note: You can use either the side of your fingernail, a ruler, or a bone folder to crease the fold.

2. Fold paper A in half, then set it aside. With paper B lying lengthwise, fold the bottom right corner up to the left-side edge. Using a pencil, draw a line along the top edge of the folded corner.

3. Unfold paper B, and cut along the drawn line. Now you should have a diamond shape and a rectangle shape. Label the cut part (rectangle shape) as C, and this will serve as our standard measuring tool for our pop-up card (ruler). Fold paper C in half, and crease it. Then open it up and fold only the right side so the outer edge meets the crease in the middle of the paper. This will divide your “ruler” into one half and two fourths. Put two small marks at the bottom of each crease, which will serve as the measuring points, then put a “RULER” label on top of the rightmost section.

4. Lay down paper A (which should already be folded) on your work table with the crease closest to you. Put the RULER on top of paper A, lining up the right edges of the papers, and mark the two points on paper A with a pencil. Move the RULER to the left until the right edge of the RULER is above the right pencil mark in paper A. Then mark in paper A from where the middle point in the RULER is placed.

5. Put the RULER lengthwise to the right side of paper A. Align the right points from both the RULER and paper A then draw a line down from the pencil mark to the crease. Repeat the process on the left side of paper A.You should now have two short parallel lines.

6. Cut along the two drawn lines, creating a flap. Fold the flap upward. Flip the paper around then again fold the flap upward. Make a smaller flap on the main flap then fold again on both sides.

Note: Folding the flap on both sides is useful especially in thicker papers as it will make the popping-up a lot easier.

7. Unfold paper A then slide your finger in the opening at the top and carefully lift the cut part. Push the smaller cut in the opposite way, then carefully close it down to make the folds sharper.

This is the foundation of the pop-up gift box! You can now start decorating with your colored markers but leave the small cut portion alone.

After decorating, fold the paper in half with the design facing out, then draw and cut a half-heart shape on the small cut portion. Finish decorating the remaining part of the gift box!

Fold one thick colored paper (any color of your choice) crosswise, then paste your designed pop-up card on it using a glue stick. Make sure to align both of the papers in the middle!

Now this is where it can get really fun! Now that you've learned how to make pop-up cards, make them unique. Maybe it's a birthday card or a Christmas card. Maybe you could add turkey decorations and make a Thanksgiving card. The only limit is your own imagination! Here are some of the beautiful pop-up cards that our students at Creativity School have created!

Want more free art tutorials for kids? Visit creativityschool.com/free for 5 free classes! Or click here to get notified about our Black Friday deals! 

Share on facebook
Facebook
Share on twitter
Twitter
Share on pinterest
Pinterest

Creative Kids Live

“We can tell that Creativity School is having a positive impact on my son’s motivation for school and his overall well-being. We know art and creativity are always boosts for academics and health! This is proving it!!!"
- Celina G.

On Demand Class

“Arree Chung, your class is fantastic! I am sure other parents would agree that Creativity School is more of a FAMILY DEAL! Because I, as a parent who has no drawing experience, learned too.”
—Miao

Related Blogs

It seems we can't find what you're looking for.

Classes

About

Schedule

Membership

blog

Scroll to Top

Where can we send your lessons?