How to Paint a Bird in 7 Easy Steps
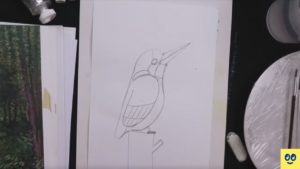
Last week, we learned how to draw the Kingfisher!
It's now time to put life into our sketches using impressionism with our favorite paintbrush and set of colorful acrylic paints!
This famous art style uses vibrant paint colors and bold brush strokes—just the perfect style to showcase the kingfisher’s bright and beautiful colors.
Get those materials ready, and let's start!
Get Access To Our Free Live Art Classes at the Creativity School
Engage your child and enhance their creative potential this holiday season!
The Creativity School is giving away free LIVE art classes from our award-winning artists.
Learn how to do animation, make pop-up cards, draw ninjas, paint characters, and many more!
Part 2: Painting a Kingfisher Using Impressionistic Techniques
Materials needed:
Kingfisher sketch from previous activity
1 set of Acrylic paints:
- white
- yellow
- vermillion red
- crimson red/ magenta
- ultramarine/cobalt blue
- dark green
- brown
1 paper towel
Instructions:

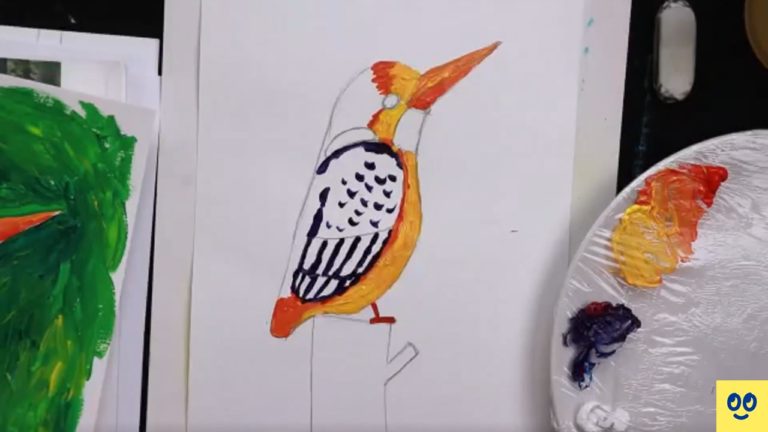
1. Put yellow and vermillion red acrylic paints on your palette. Using your brush, mix to make orange.
Start by painting the orange on the bottom part of the beak.
Add more yellow to the orange to make it lighter, then paint the upper beak.
Note: If you do not have a palette, you can use a small plastic plate

2. Paint orange along the border of the upper head, the lower right side of the eye, around the wing’s edges, and on the lower part of the tail.
Use yellow for the front head down to the lower eye (leaving the neck part), then on the upper body down to the lower tail.
Lastly, add more vermillion red to the orange to make it darker, then paint the tiny leg and foot.
Note: You can use the paper towel to wipe off the excess paints from the brush to avoid smudging or unnecessary mixing of colors.
3. Mix crimson red or magenta and ultramarine or cobalt blue to make purple.
Paint purple along the outline of the feathers and on the upper part of the wing.
Make small purple strokes inside the wing for details.
Note: You can use any red and blue shades if you don't have the exact paint colors that we'll be using.
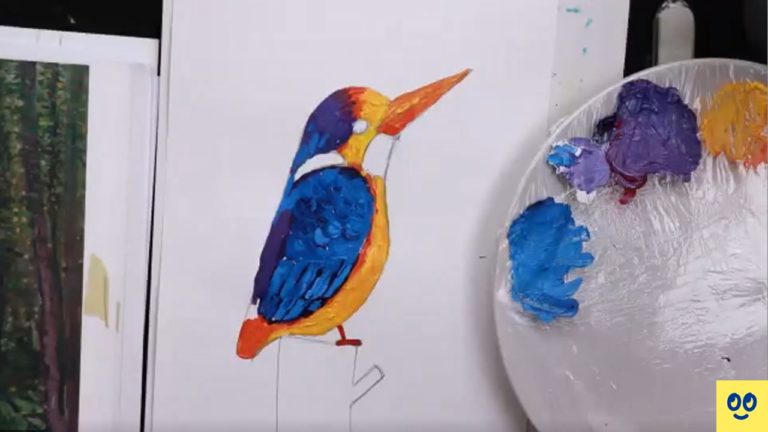
4. Mix white and purple to make a lighter color.
Paint the back part of the head and the wing (leave a small portion above the tail).
Mix white and manganese blue, then paint all the spaces inside the wing.
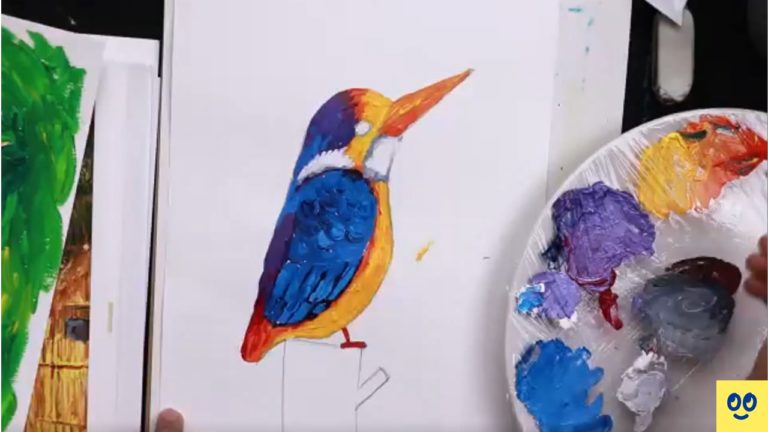
5. Mix the orange, cobalt blue, and white to make gray.
Paint around the neck and on top of the wing, then add white shade on the middle spaces.
Paint crimson red on top of the tail and orange at the bottom of the beak to make it more vibrant.
Note: We do not recommend mixing black and white for gray. Black is neutral and impressionist painters do not want too much black on their paintings. Instead, they use complementary colors (green-red, orange-blue, yellow-violet) and white to make a brighter gray.
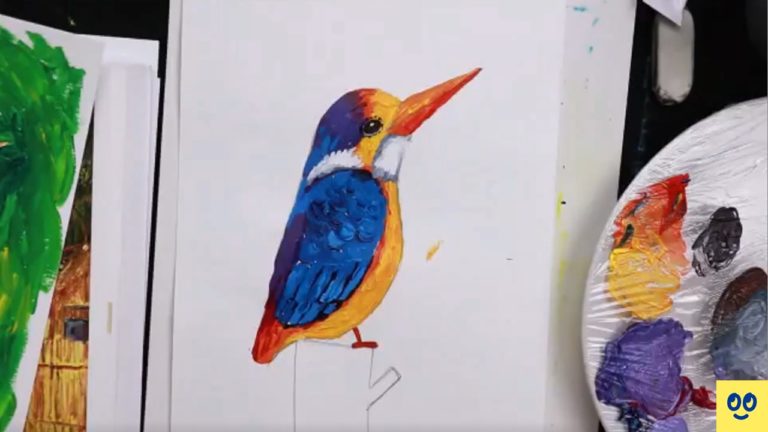
6. Mix cobalt blue and vermillion red to make a dark violet, then paint the eye.
Add small dots of the same color around the eye and a small white dot in the middle to make it more realistic.
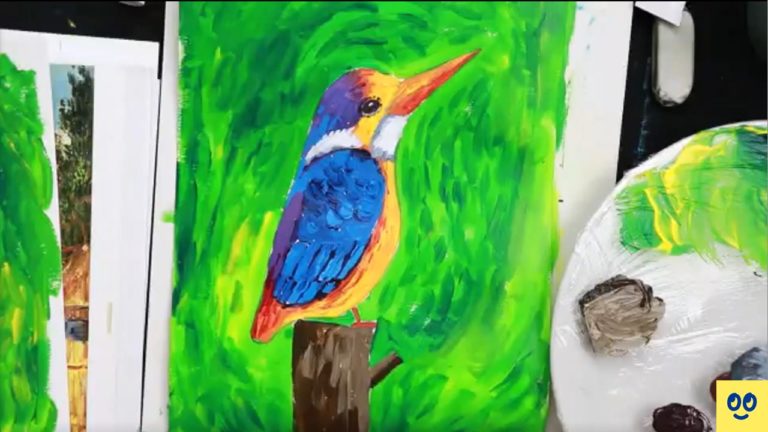
7. Mix dark green and yellow to make a lighter green, then paint the background.
Add dark green strokes around to resemble leaves.
Paint brown to the branch, then use white for artistic shade.
Voila! We're done painting the Kingfisher!
If your painting does not appear exactly as in the picture, don't worry!
You don't have to have the exact color, you just need to have the identified colors and correct combination, then you can experiment with the shadings!
Here are some of the cool kingfishers that our young artists at the Creativity School painted!

Want more art tutorials for kids? Watch full classes here for free!
Recent Posts
Creative Kids Live
- Celina G.
On Demand Class
—Miao
Related Blogs
It seems we can't find what you're looking for.